1 Item Name : Senior Care WordPress Theme
2 Created : 12 October 2025
3 Author : Innovatewebs0082
4 Support Ticket : innovatewebs82@gmail.com
Introduction
Recommended PHP configuration limits
php_value upload_max_filesize 600M
php_value post_max_size 600M
php_value memory_limit 256M
php_value max_execution_time 300
php_value max_input_time 300
What's Included
After purchasing the Calmhaven theme on ThemeForest with your Envato account, visit your Downloads page. You can choose to download either the Calmhaven theme only or the full Calmhaven theme package, which includes all the necessary files for your website setup:
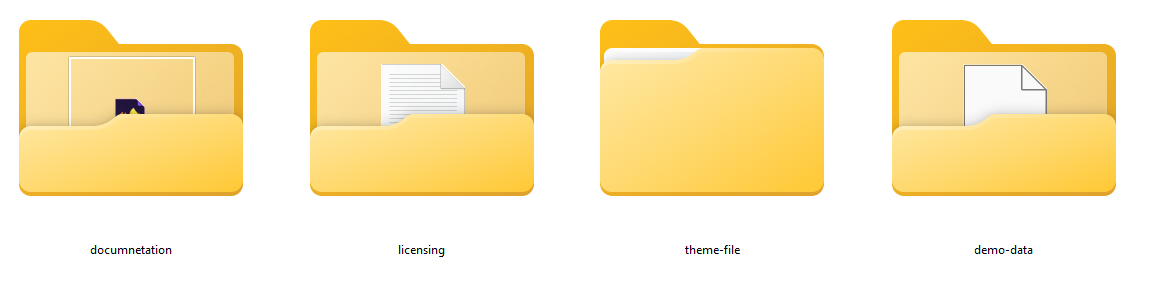
The contents of the theme package downloaded from ThemeForest
1 Calmhaven.zip : An Installable WordPress Theme zip file. this file you need to upload to WordPress.
2 Calmhaven-child.zip : This is the basic child theme for Calmhaven. Installing it is safe, and it helps preserve your custom changes when updating the parent theme. More on child themes
3 Licensing : This folder contains the terms and conditions of the license.
4 Documentation : This folder contains what you are reading now :)
WordPress Installation
Please follow the instructions in the video to see how you can install WordPress on your hosting:
1 For local host : https://www.youtube.com/watch?v=snFzbPm_RUE
2 For cPanel : https://www.youtube.com/watch?v=t-YBqV2ReR0
Installing the theme
Important! if you download the All Files archive from
ThemeForest and try to upload it to your WordPress, you will receive this error:
Theme is
missing the style.css stylesheet. Please make sure you unzipped the main archive and are
uploading the correct file to
your WordPress.
1. Upload Parent Theme
Follow the steps as instructed in the images below:
1 From the dashboard go to Appearance -> Themes -> Add New -> Upload Theme
2 Click on “Choose File” and select Calmhaven.zip
3 Click on “Install Now”.
4 Go to Themes page
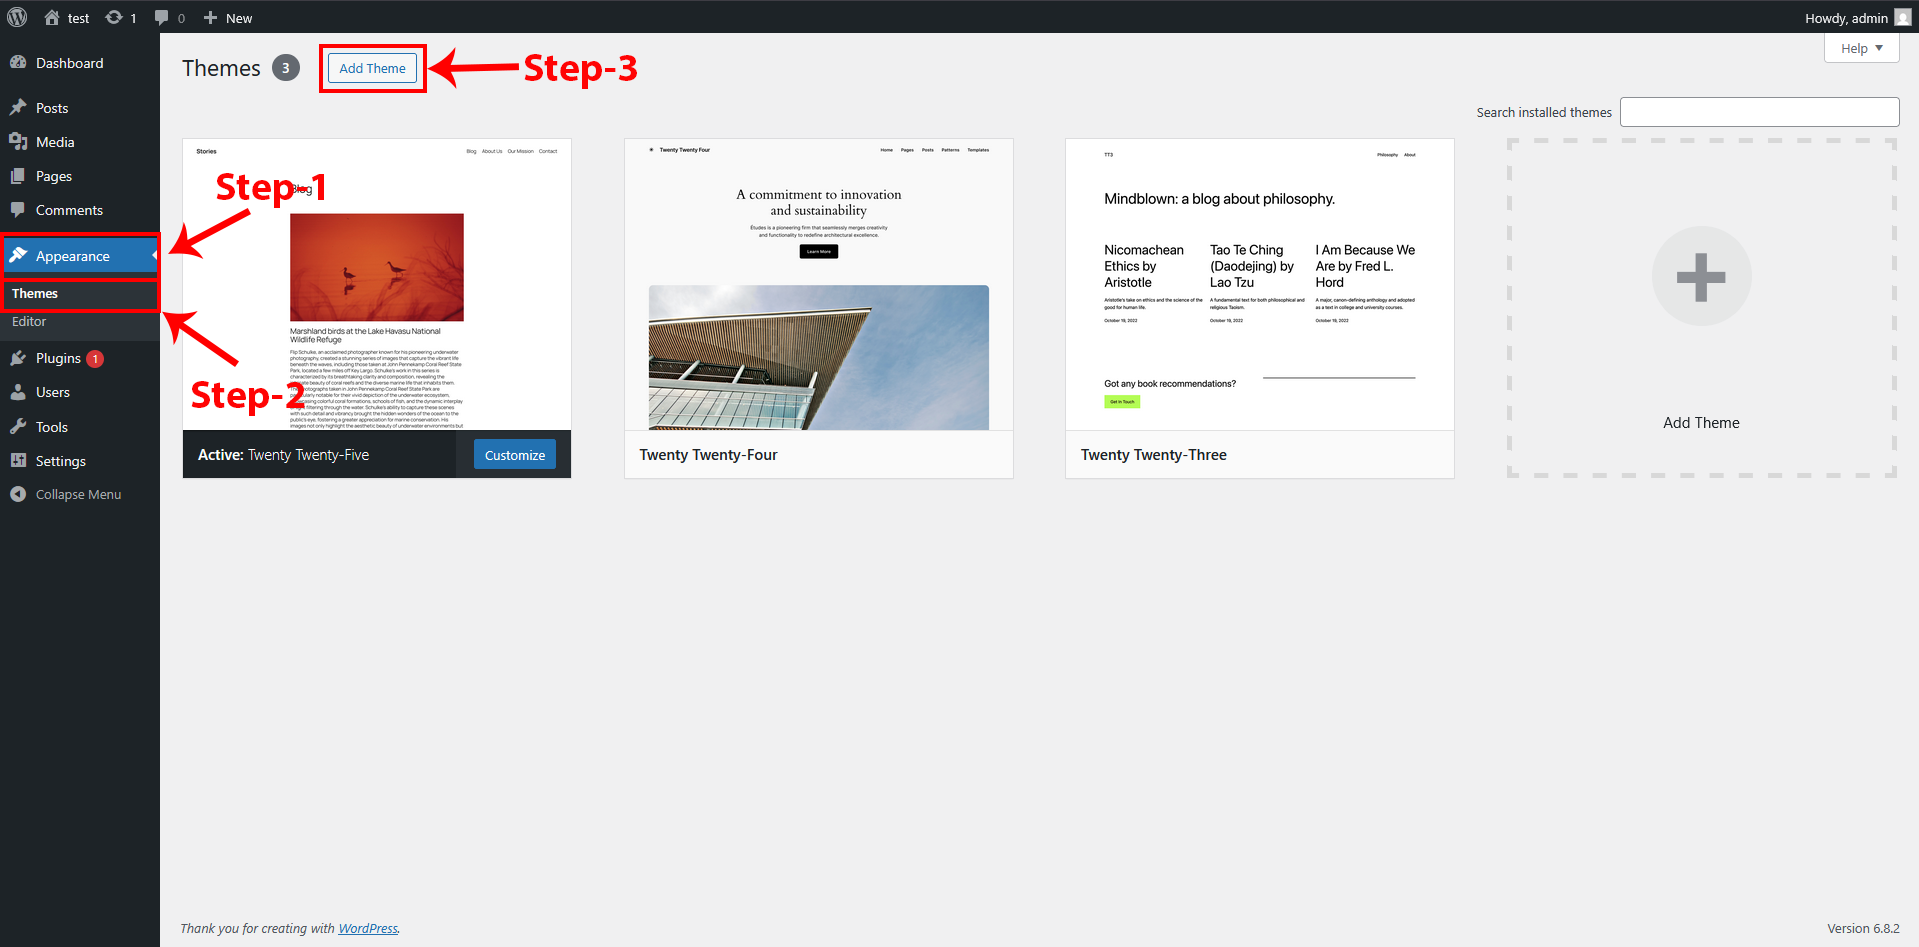
Appearance → Themes → Add New
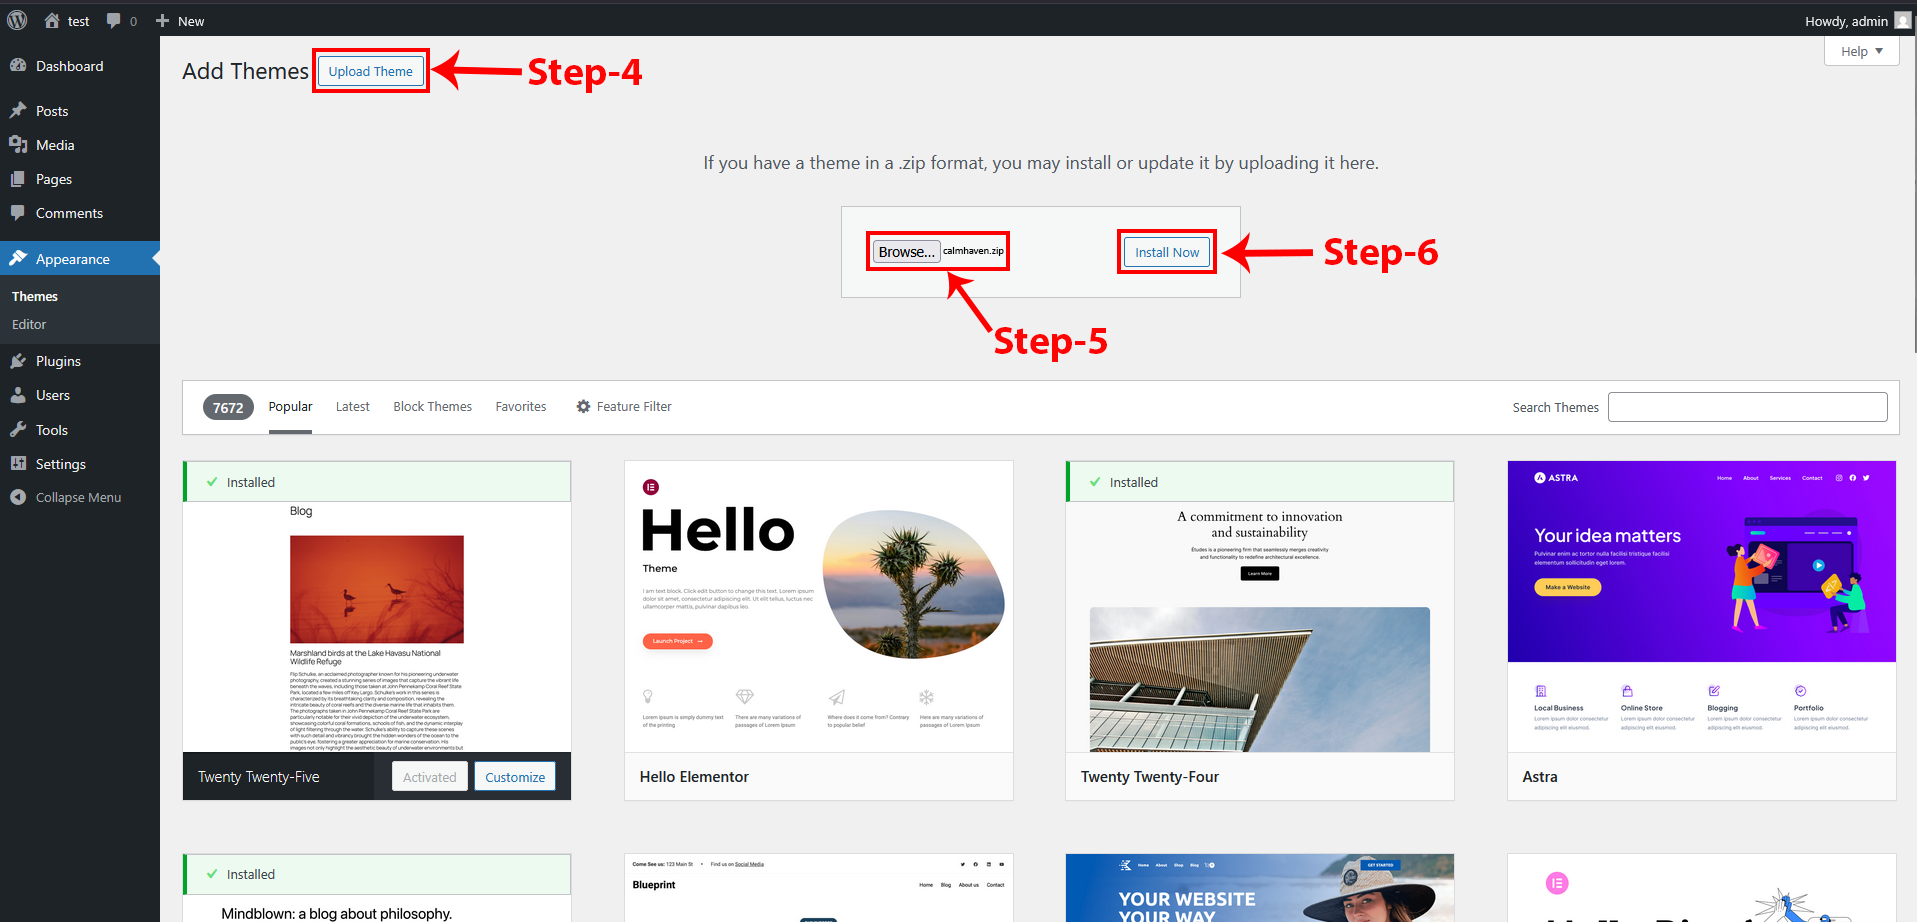
Click on “Choose File” and select Calmhaven.zip and Click on “Install Now”.
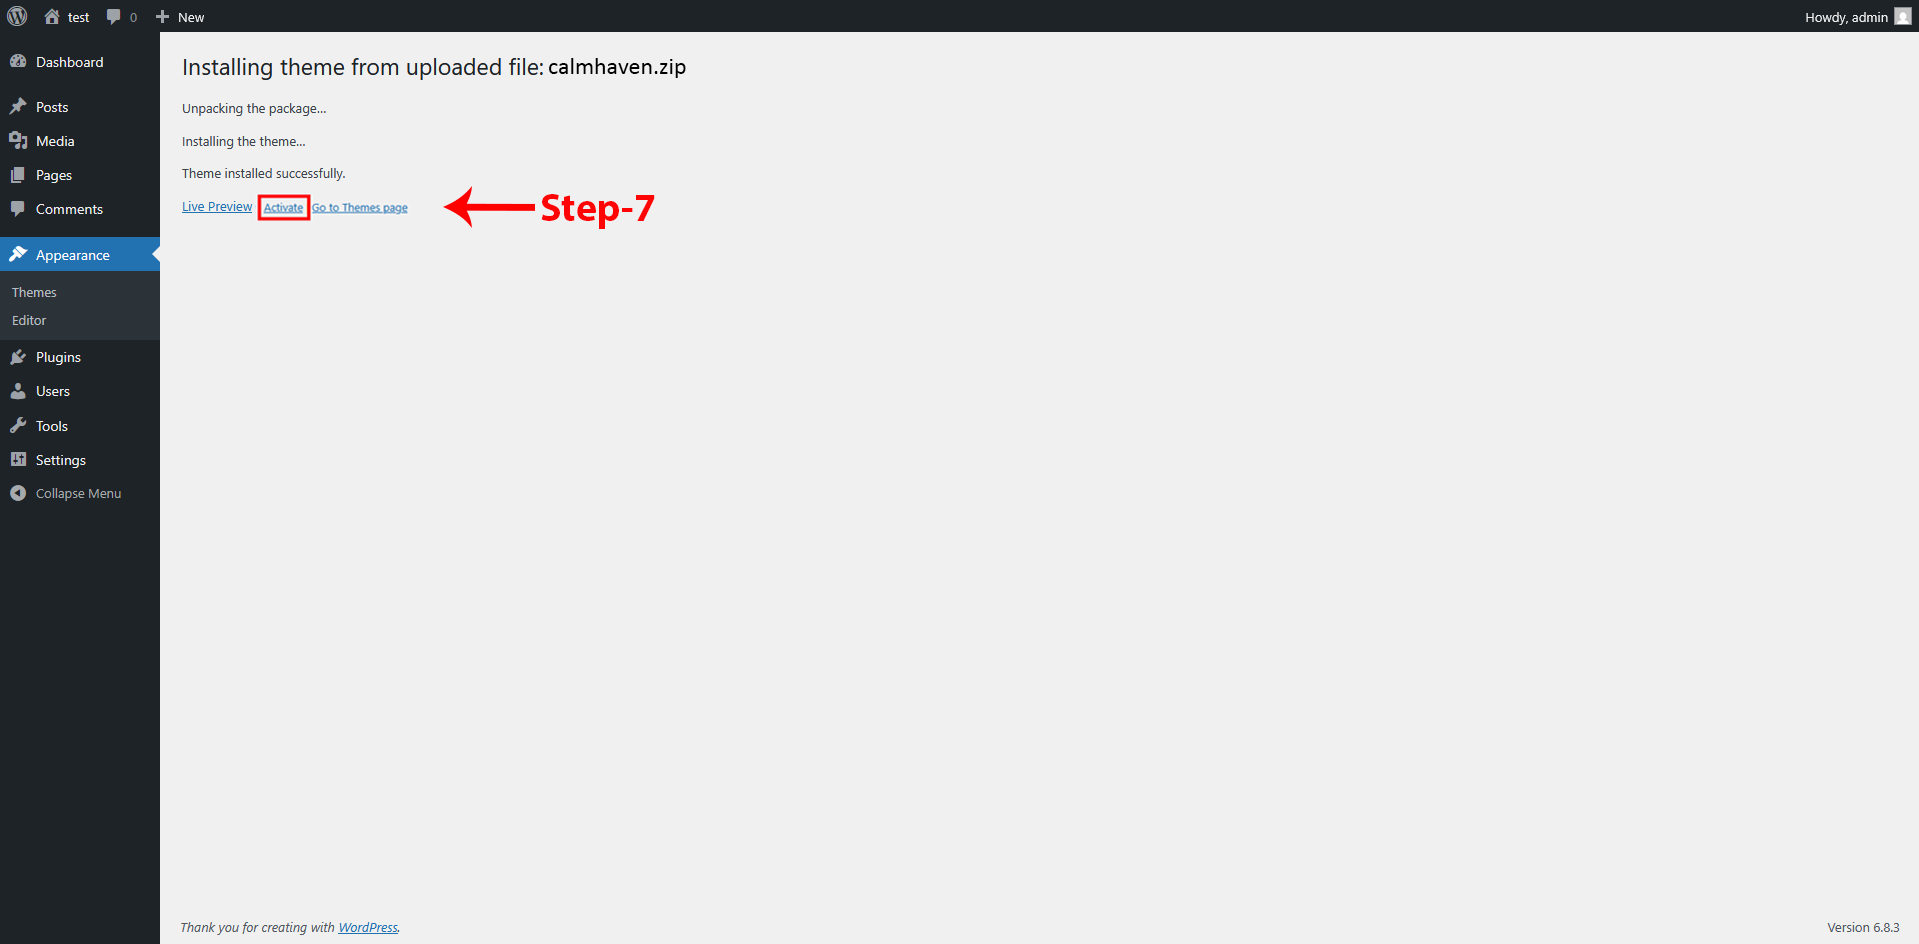
Go to Themes page
2. Upload Child Theme
Follow the following steps to upload your child themes:
1 From the dashboard go to Appearance -> Themes -> Add New -> Upload Theme
2 Click on “Choose File” and select Calmhaven-child.zip
3 Click on “Install Now”.
4 Activate Theme
Appearance → Themes → Add New
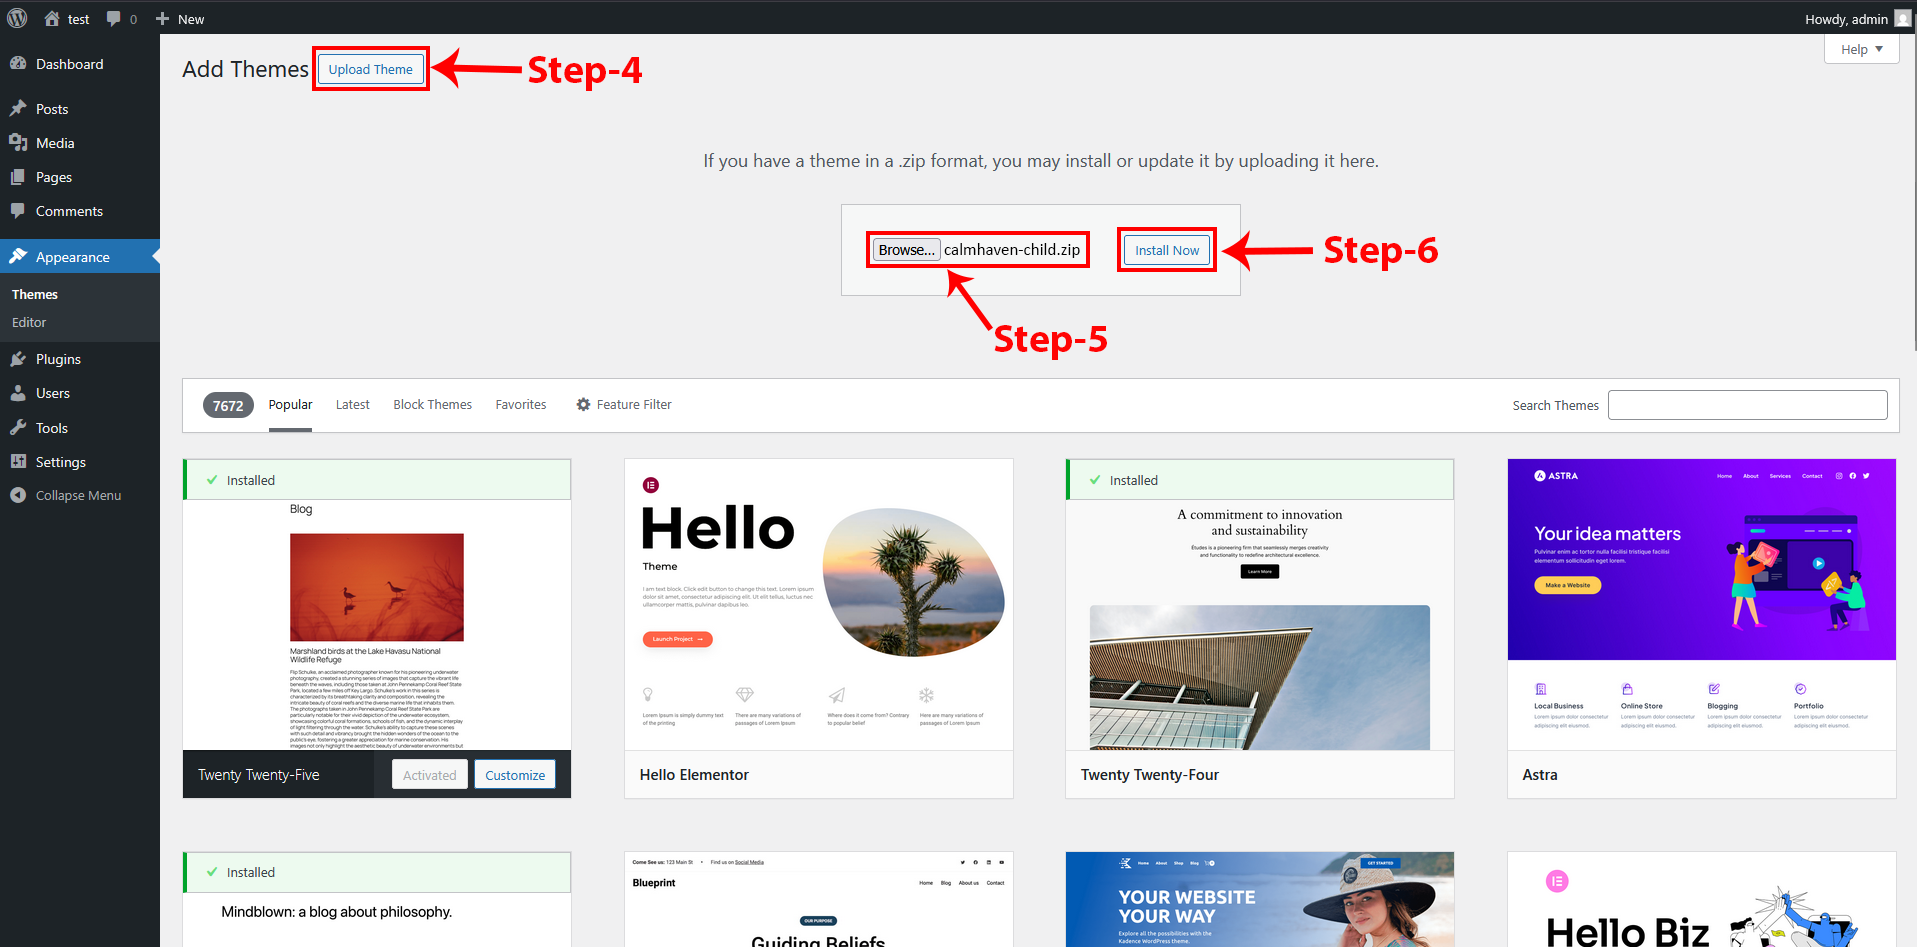
Click on “Choose File” and select Calmhaven-child.zip and Click on “Install Now”.
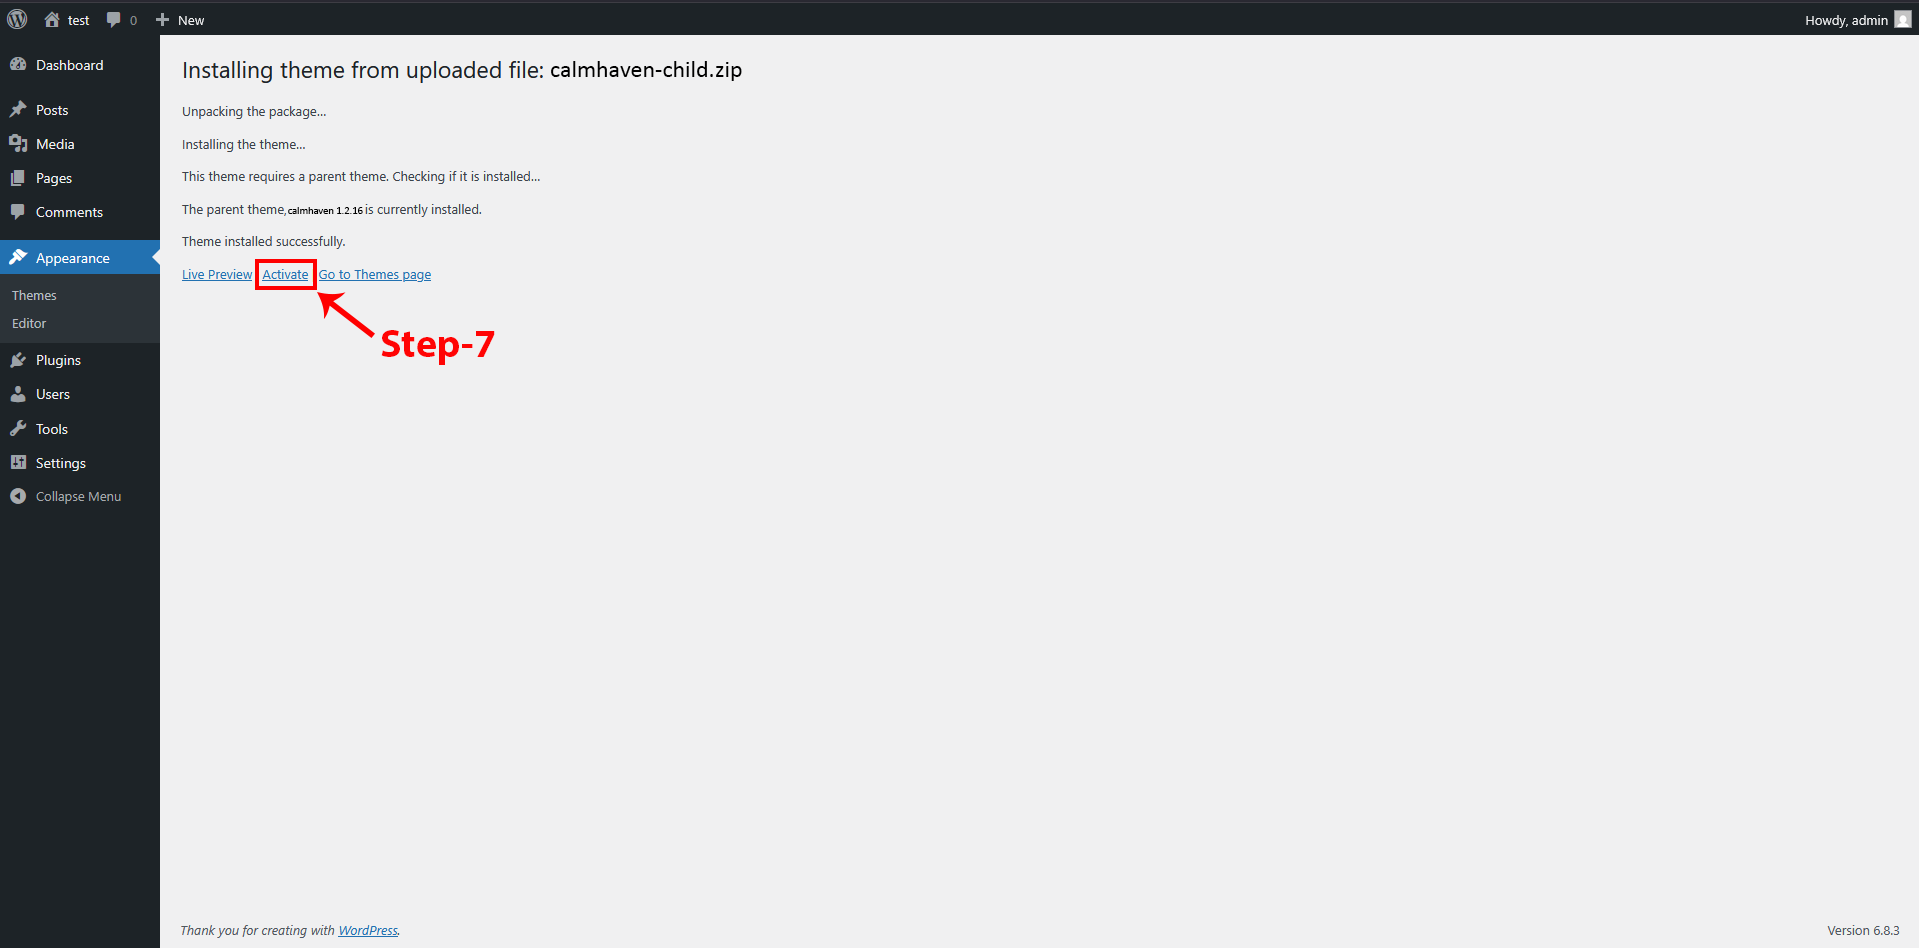
Activate Child-theme
3. Installing required plugins
After activating the Calmhaven child theme, it is important to install all the required and recommended plugins. These plugins add essential functionality and advanced features that are not included in the base WordPress installation.
1 From the dashboard go to Appearance -> Install Plugin
2 Toggle all the required plugins and hint “Install”
3 The last step will be installing of plugins.
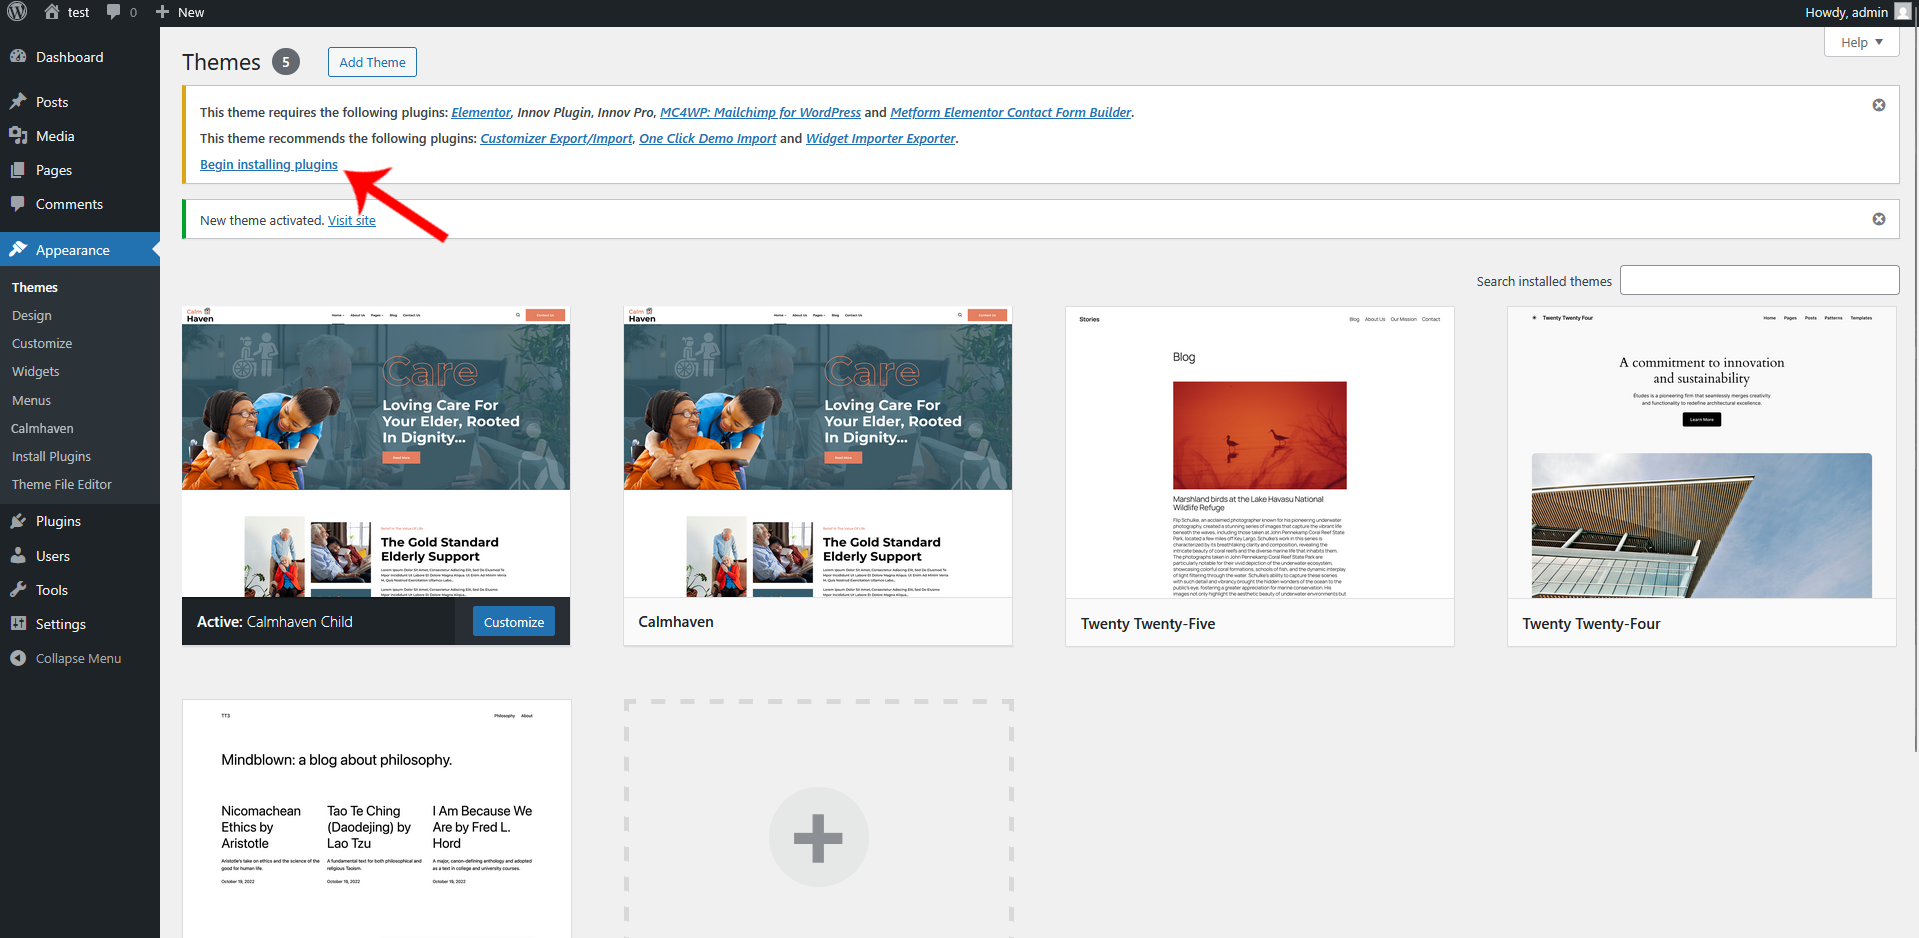
Click on the begin installing plugins link to install all the required plugins.
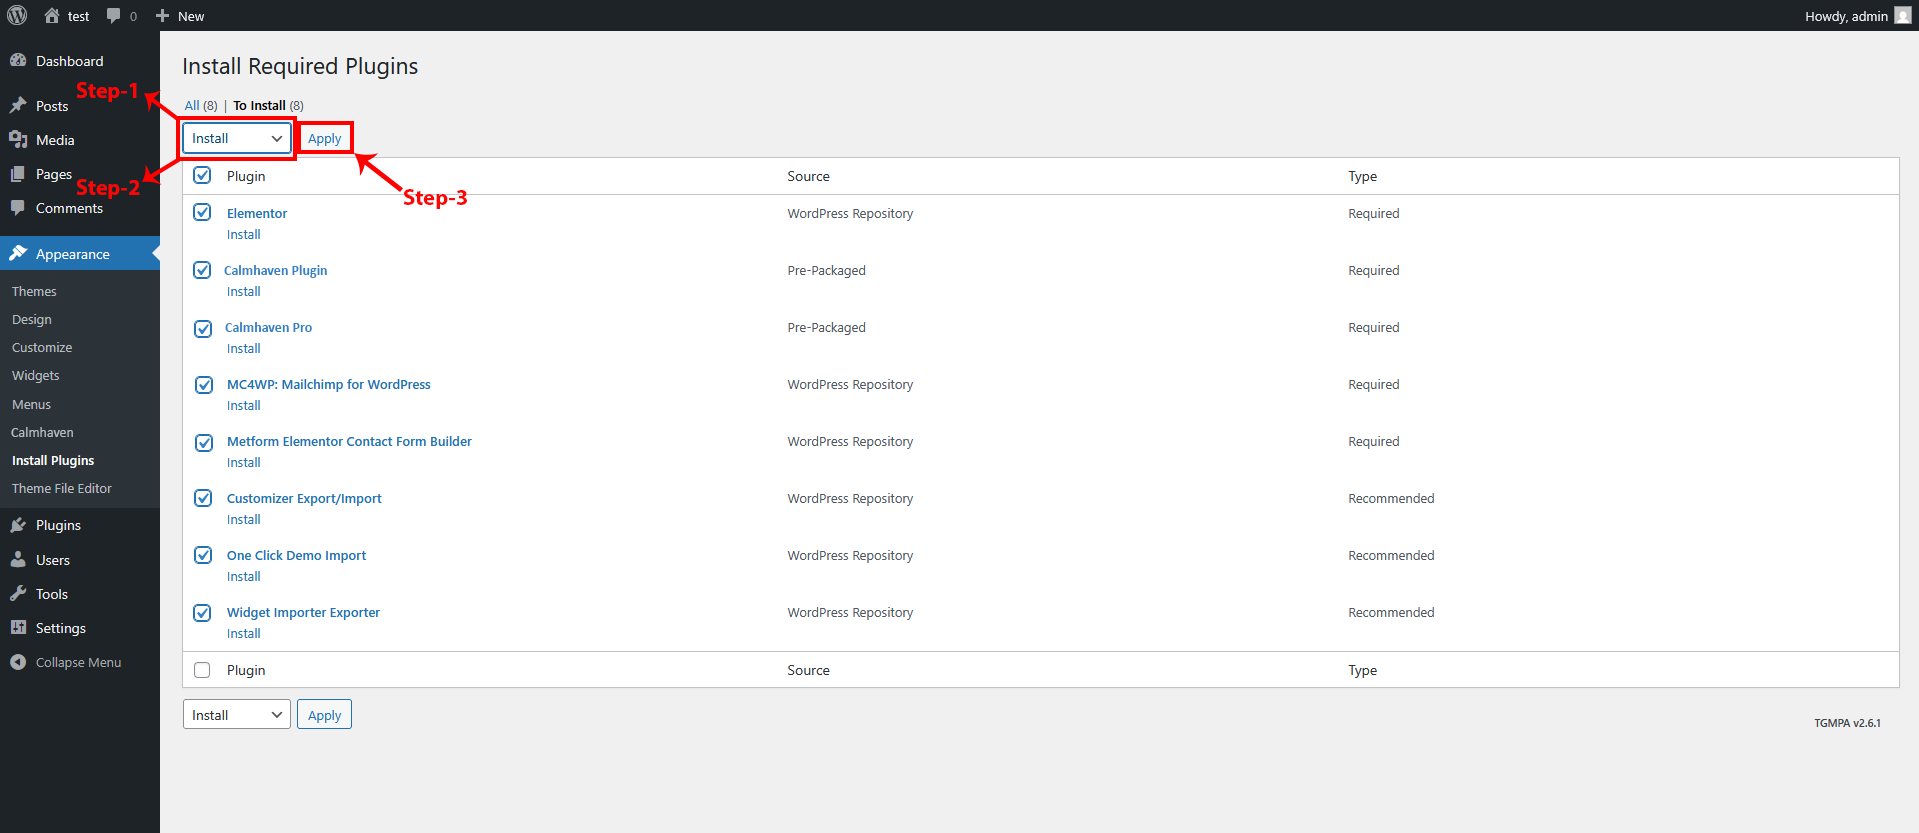
Select all and install
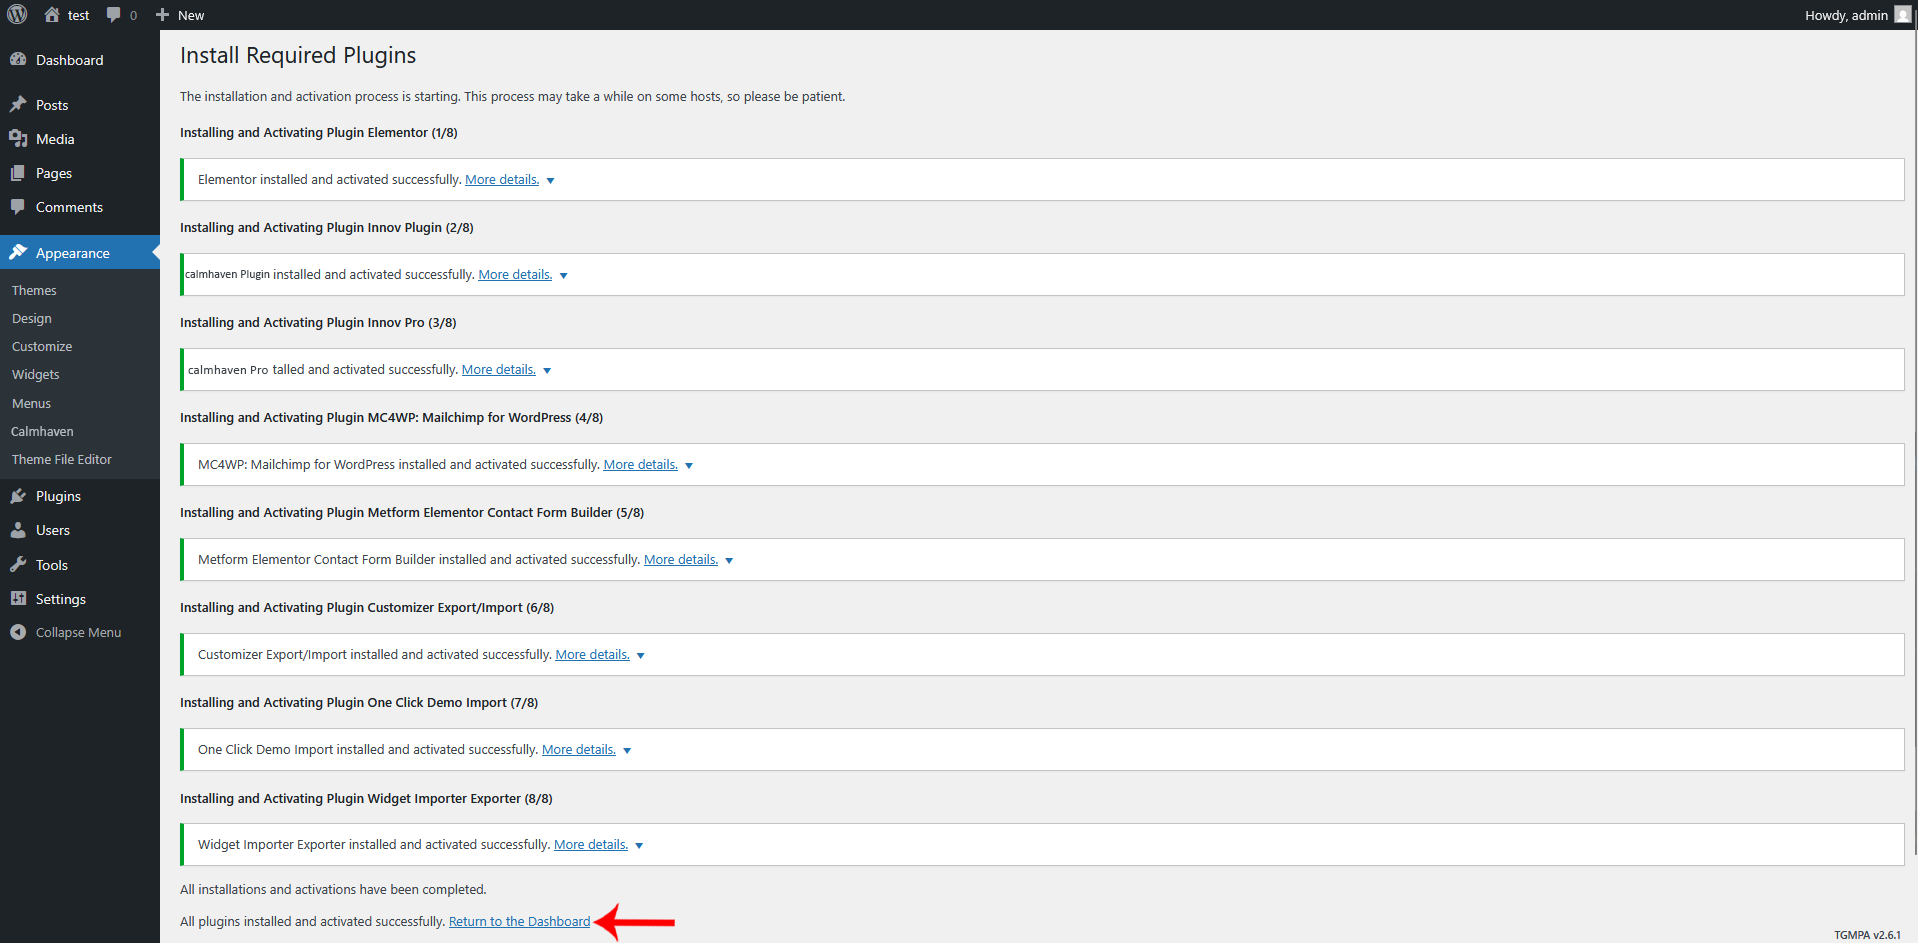
Return To The Dashboard
4. Pro Addon Enable
After installing all the required and recommended plugins for the Calmhaven theme, it is important to activate all the PRO add-ons. These add-ons unlock additional features and enhanced functionality, allowing you to take full advantage of the theme’s capabilities.
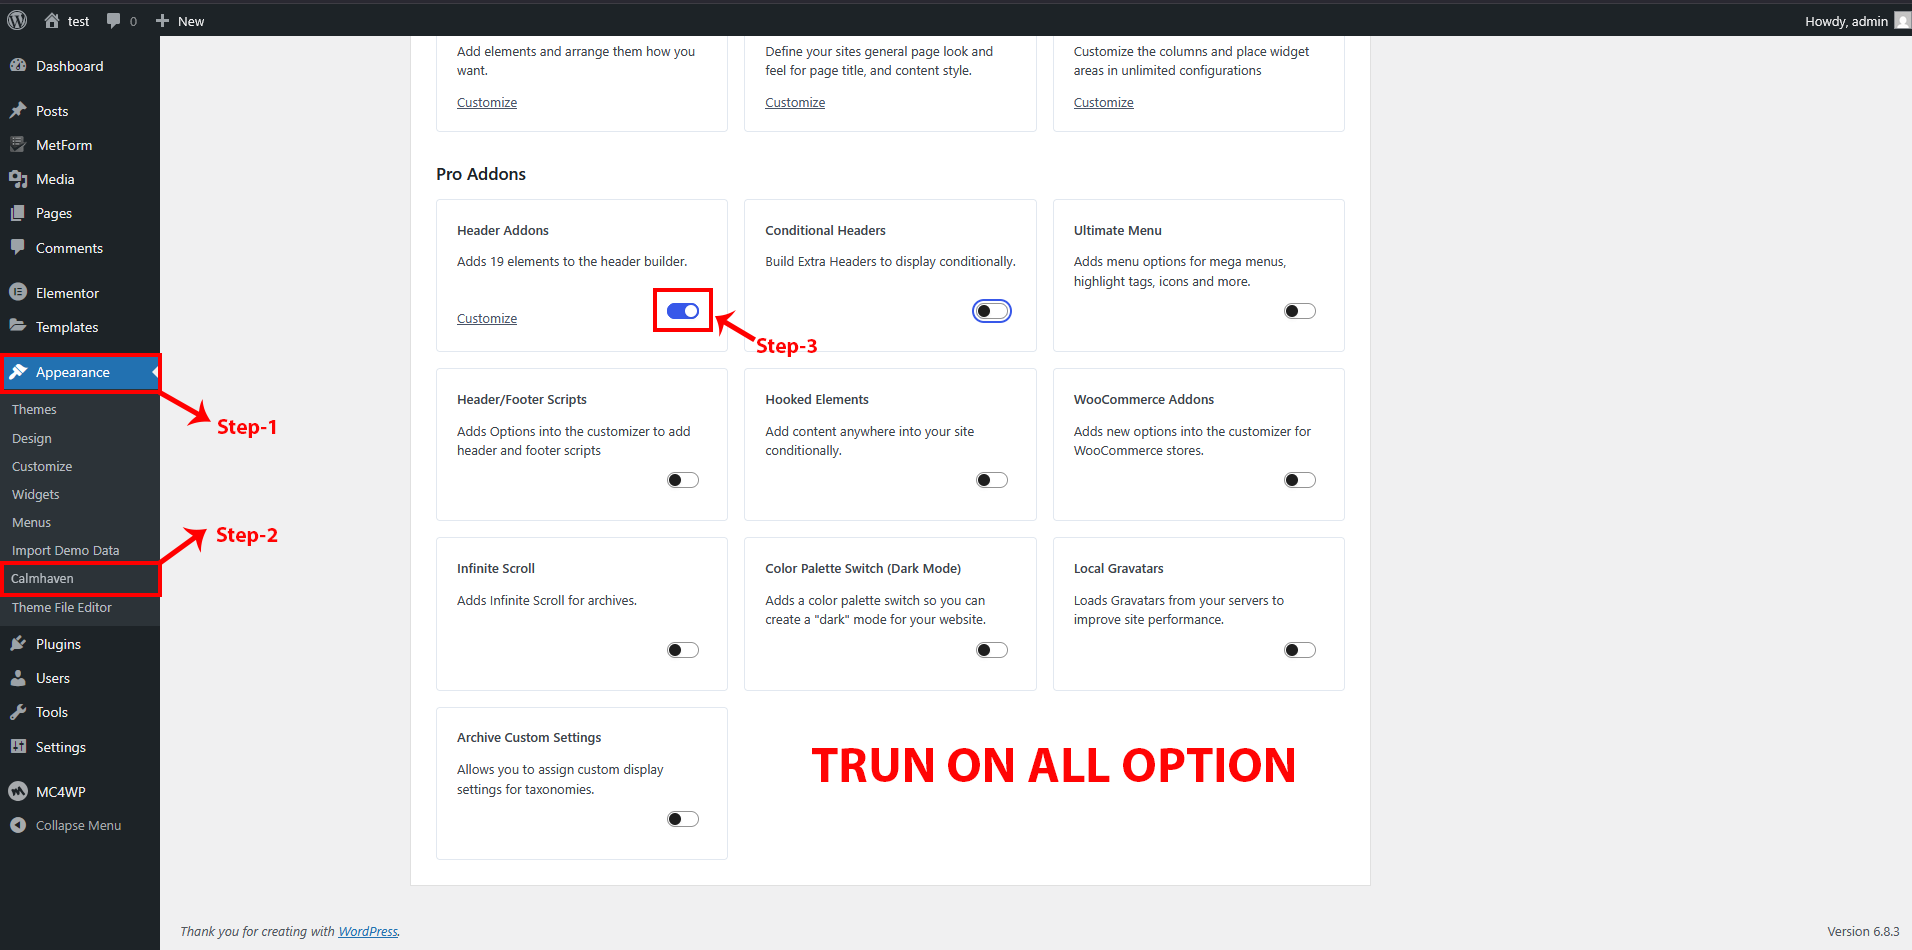
Enable all the pro addons
Importing Demo Contents
1. One Click Method
This method will remove all existing content on your website, so it should only be used on a fresh installation. It is the fastest way to set up your site, as everything is done automatically with a single click. If you want your website to exactly match the Calmhaven demo without having to configure anything manually after importing the data, this method is the most suitable choice.
Note: Please remember that when you are done with the demo import, your some existing settings will be replaced by the demo contents Like: Your menu, Customizer. So it is recommended that you should only do this in fresh site.
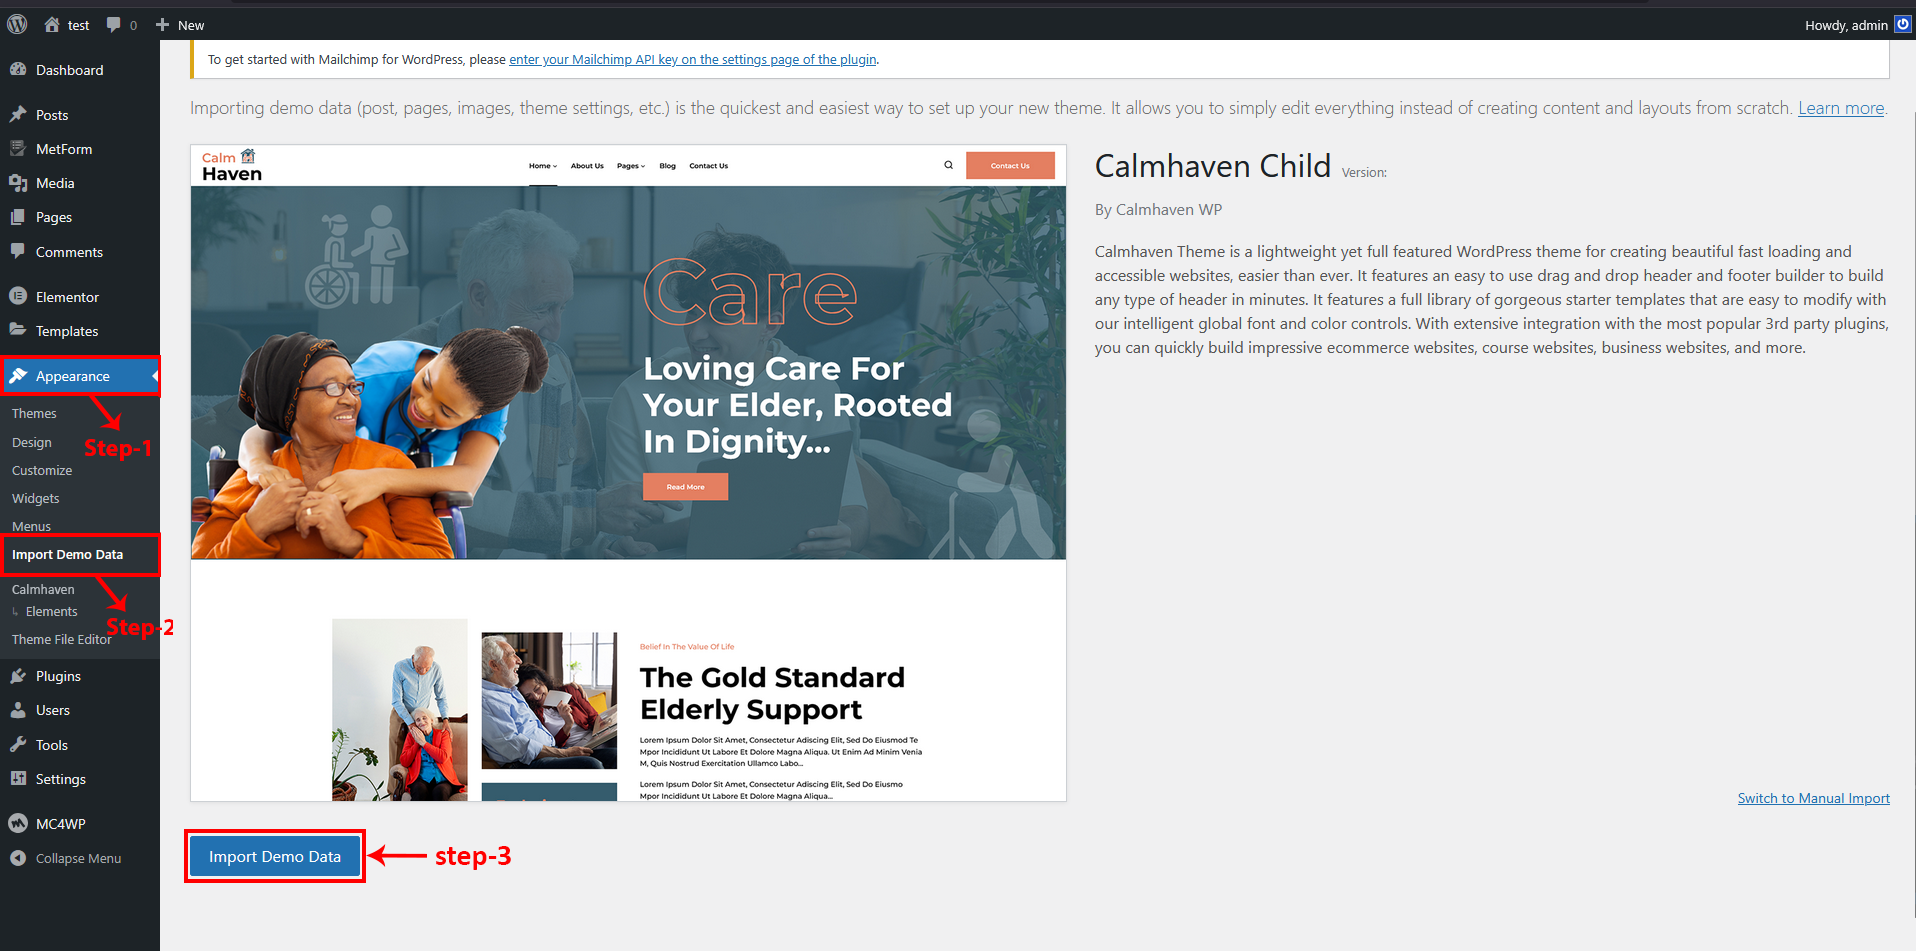
1 Ensure, that the One-Click Import plugin is installed and activated;
2 From the dashboard go to Appearance -> Import Demo Data
3 Choose the demo you want to install and click on the “Import Demo Data” button below;
4 Then click on "Continue & Import " button
5 After that "Import Complete" will be shows
go to Appearance -> Import Demo Data
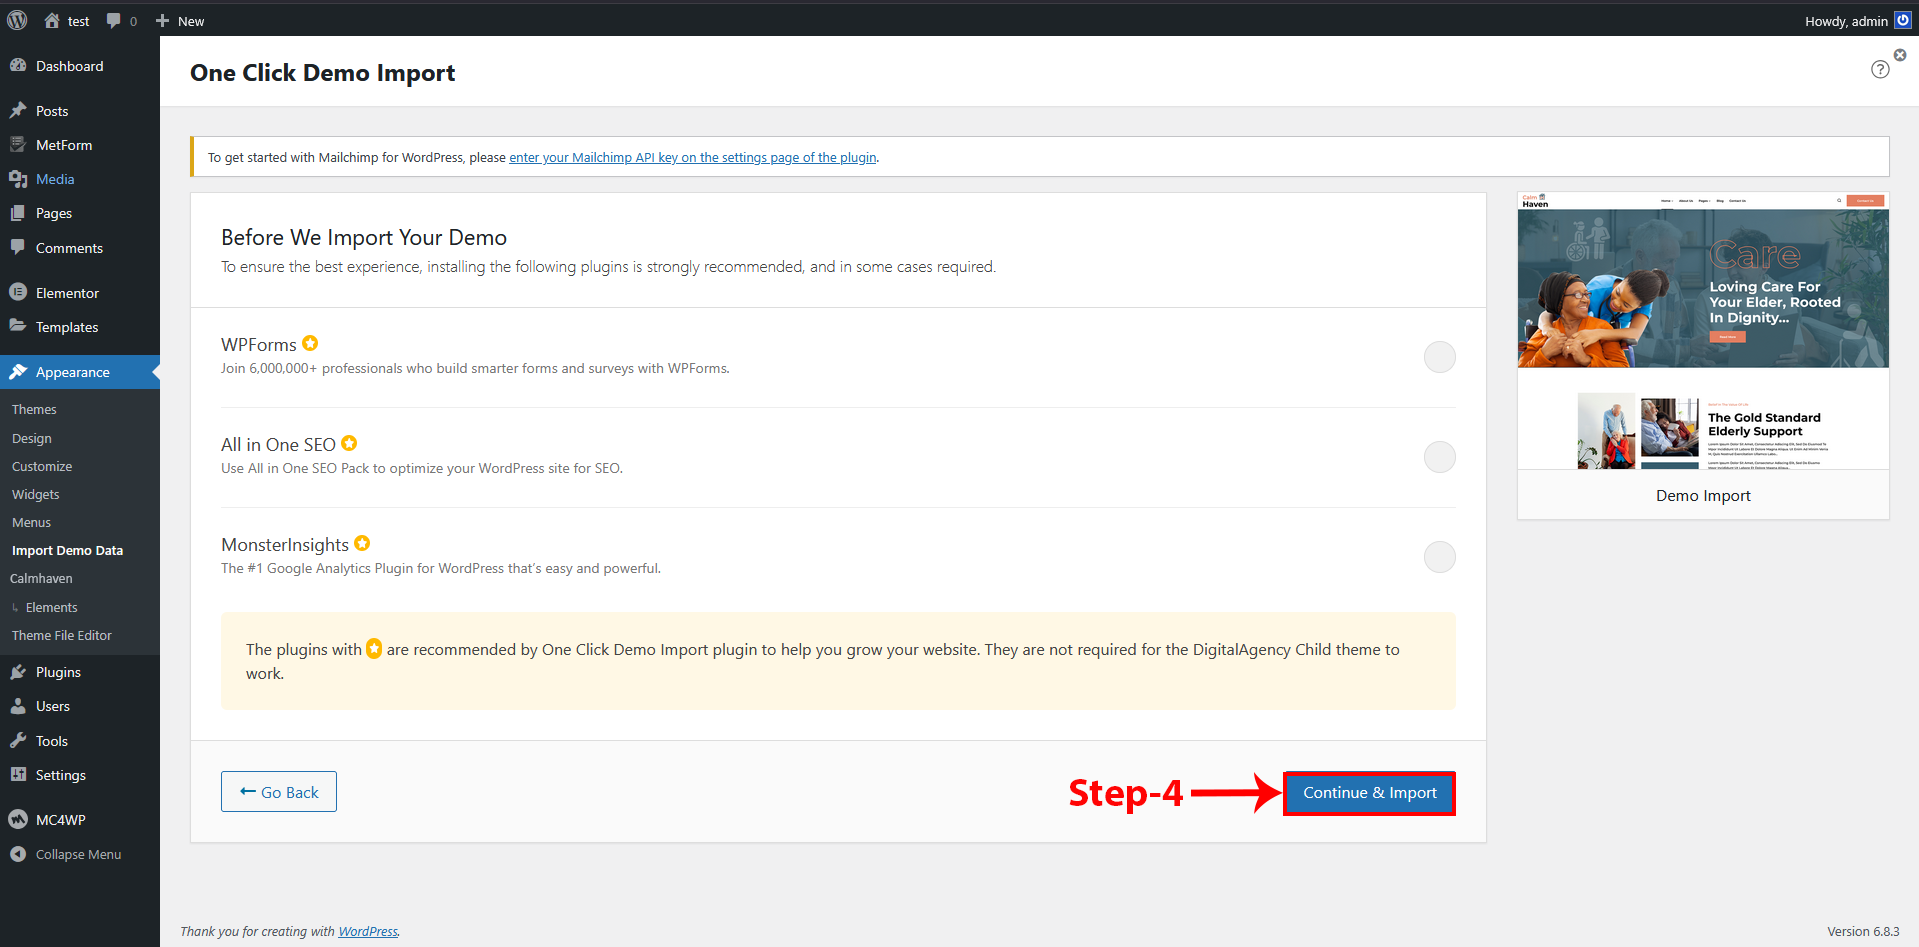
Click "Continue & Import" Button
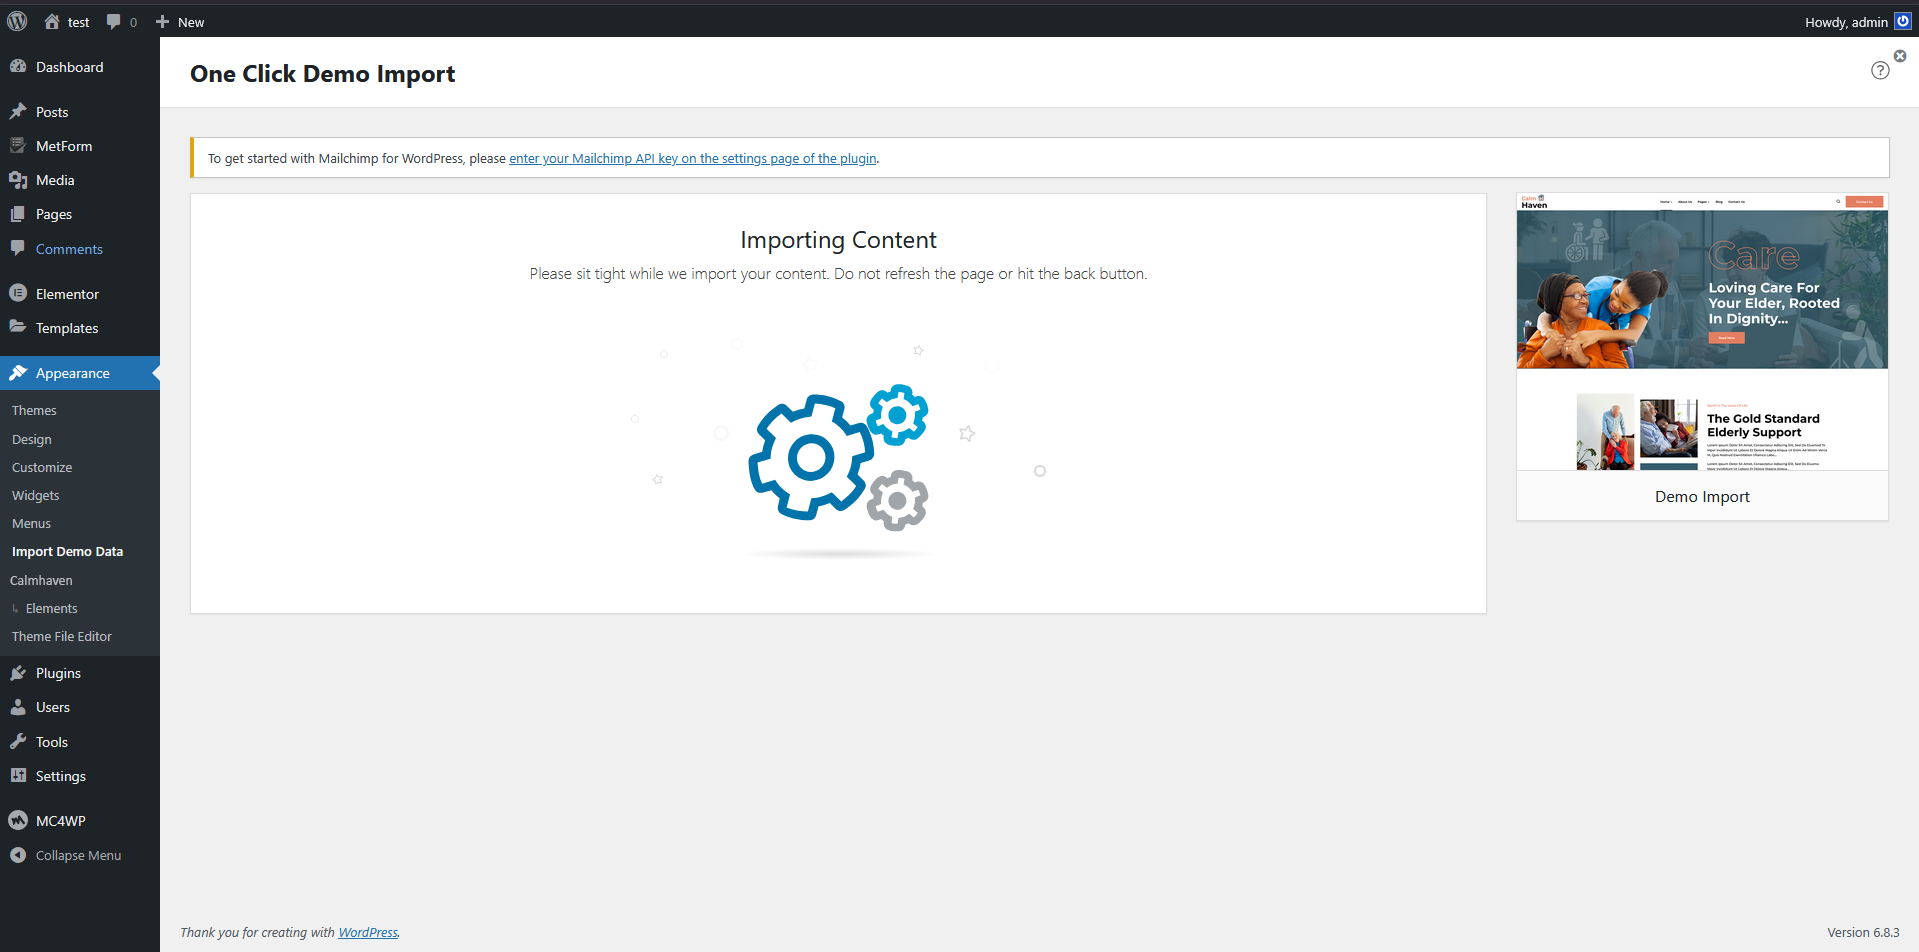
Processing
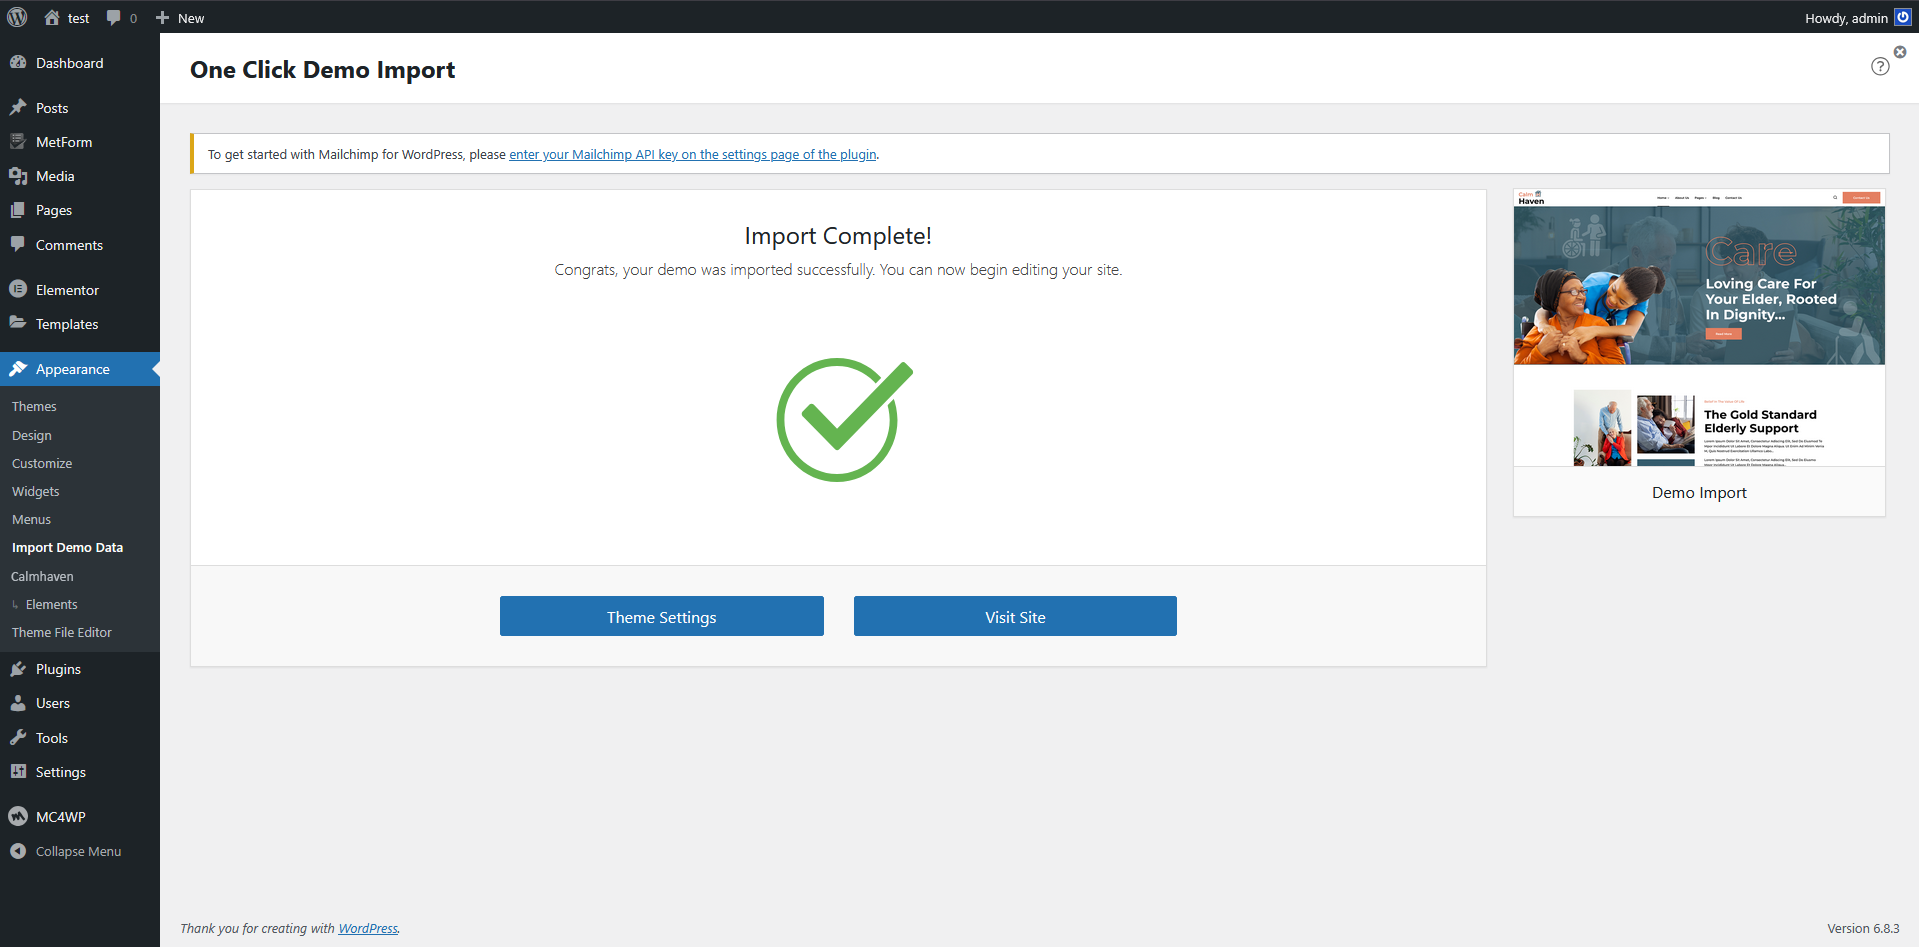
Import Complete! Congrats, your demo was imported successfully.
There is one other method to import demo data which is given below :-
Manual Import
1 Click on the Switch to Manual Import link which is give you to right side corner.
2 Select the XML file from your folders - Child theme -> Demo Data
3 After that select the WIE and DAT file like you select the XML file.
4 Then click on "Continue & Import " button
5 After that "Import Complete" will be shows
go to Appearance -> Import Demo Data
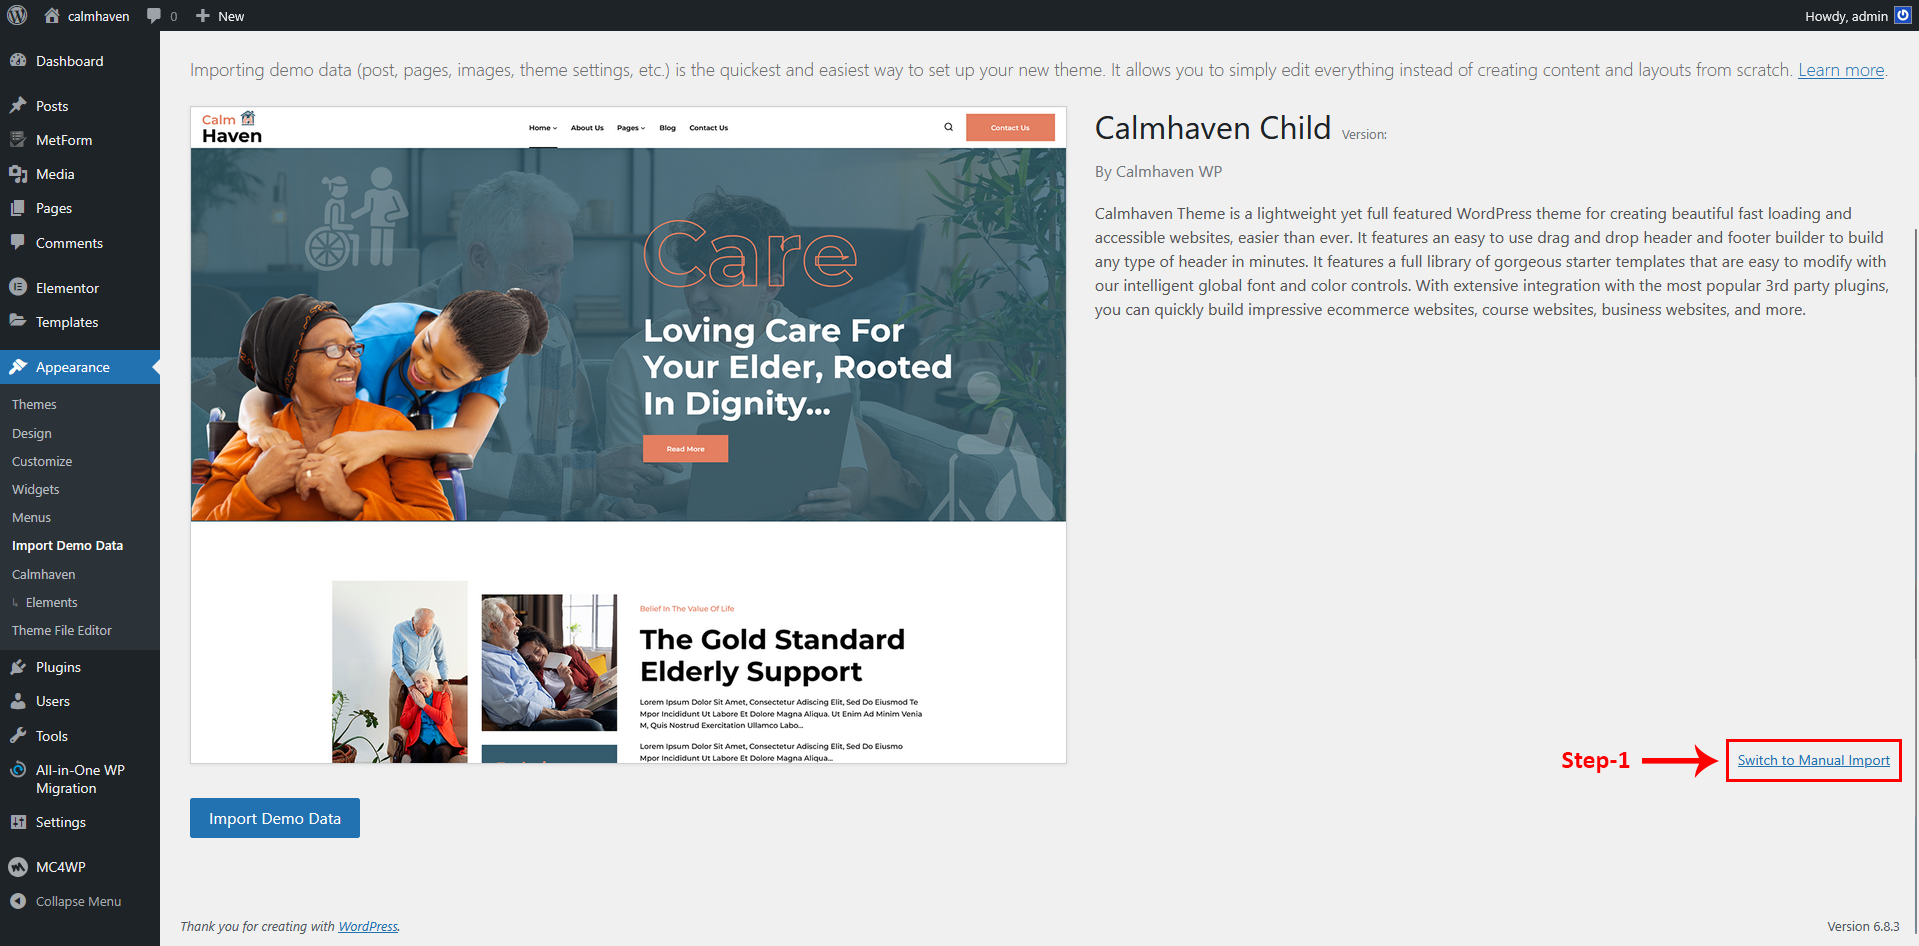
Click "Switch to manual import" link
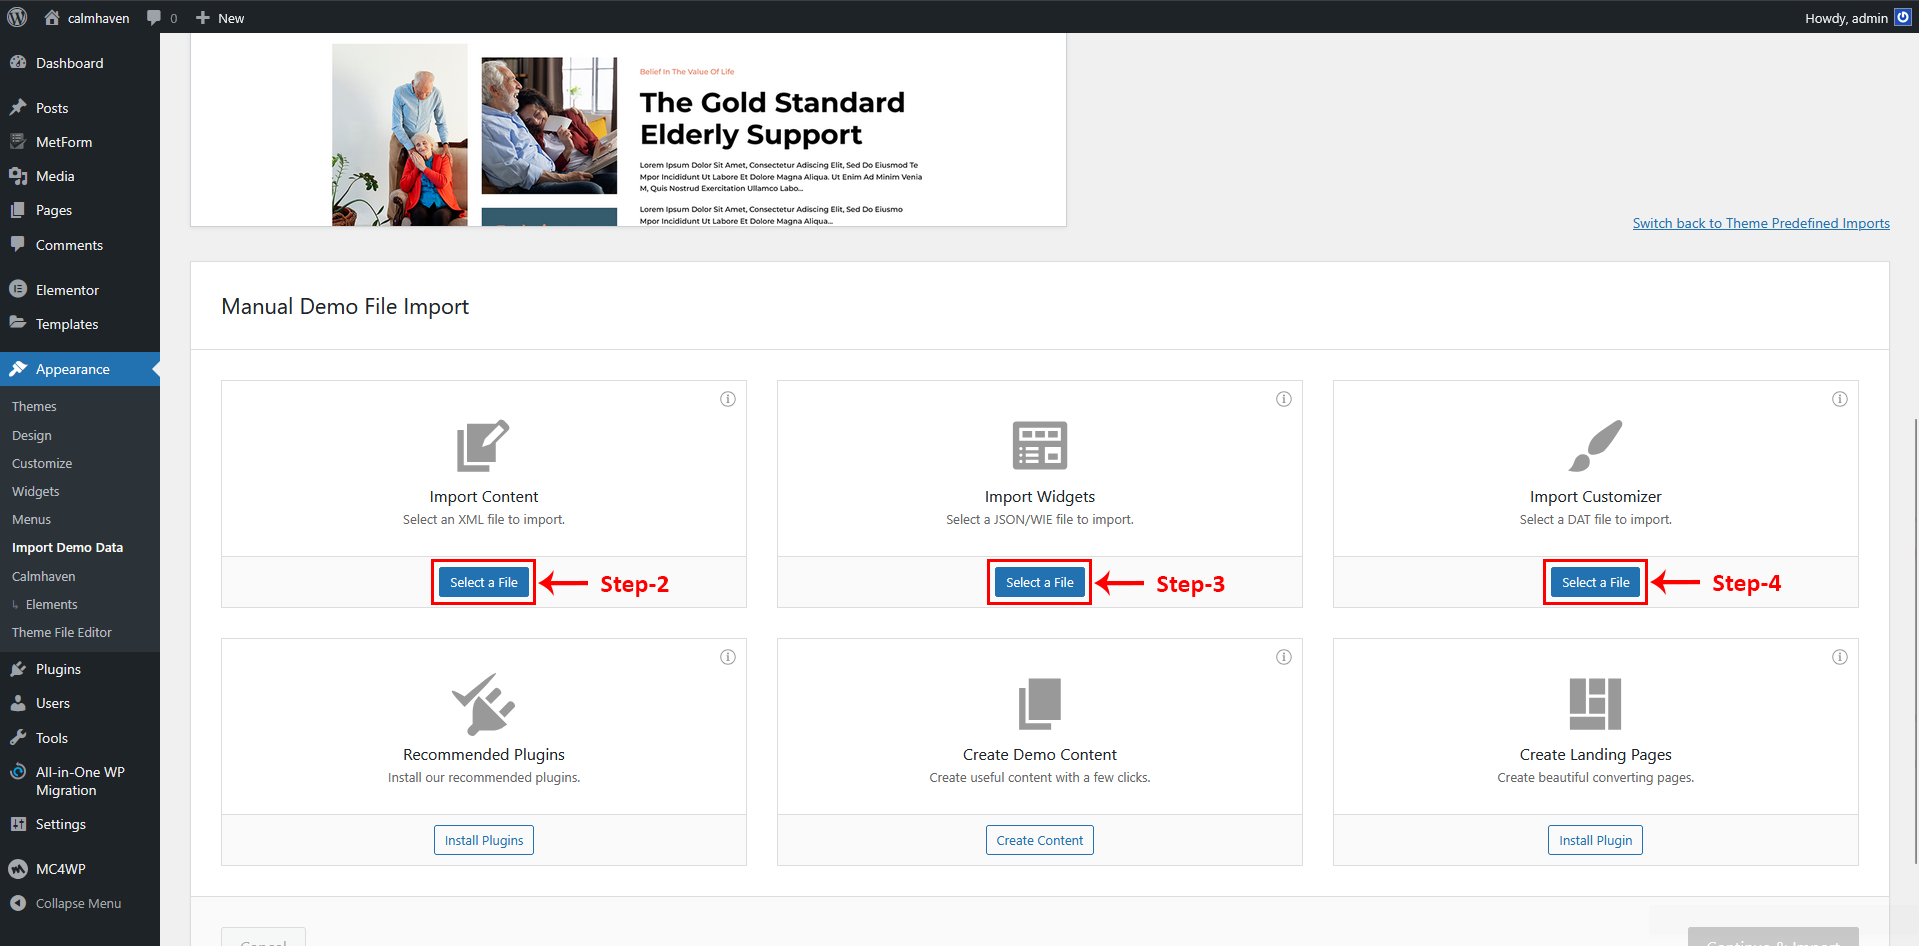
select all the files
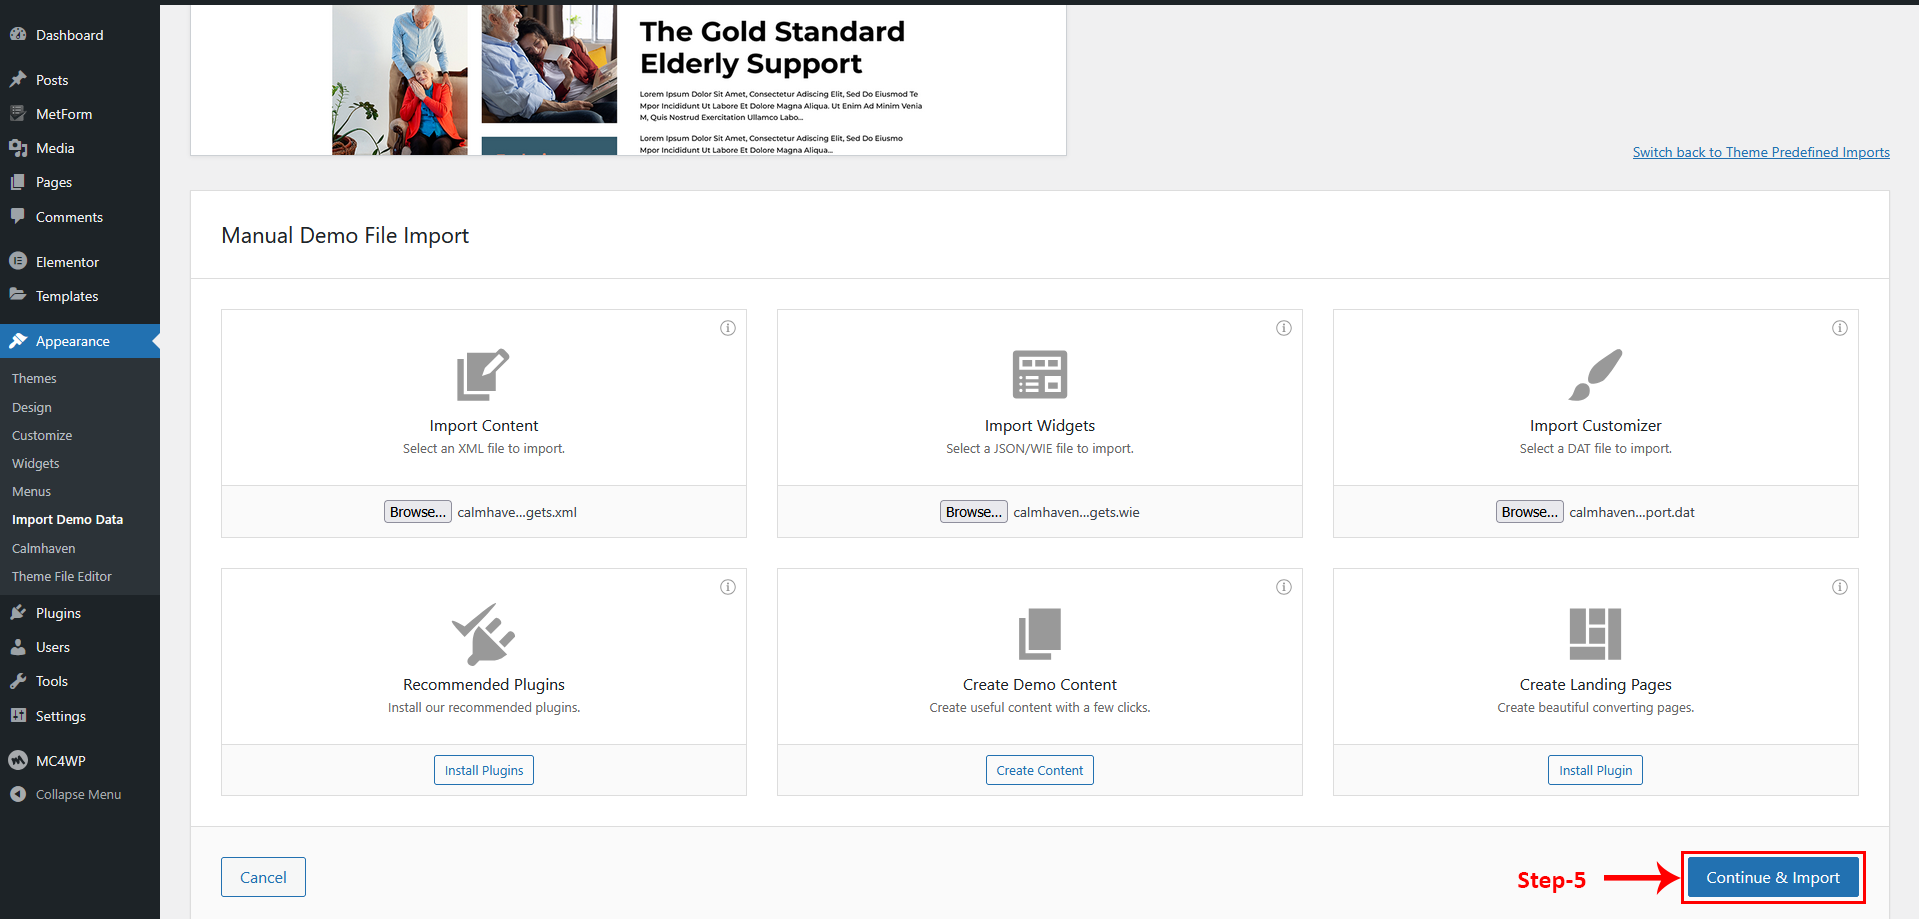
Click "Continue & Import" Button
Import Complete! Congrats, your demo was imported successfully.
Basic Site Setting
Here you can customize the overall layout of your website. Adjust the container width, padding, and gaps to achieve the exact look you want.
Changes you make here will apply globally across all pages.
1 To make basic site setting go to Dashboard -> Pages
2 Hover over the Home page, and you will see a popup option. Click on "Edit with Elementor"
3 The Elementor editor page will open.
4 Click on the "site setting" icon as shown in the picture below.
5 In the Layout option, make changes according to the given picture and save the changes.
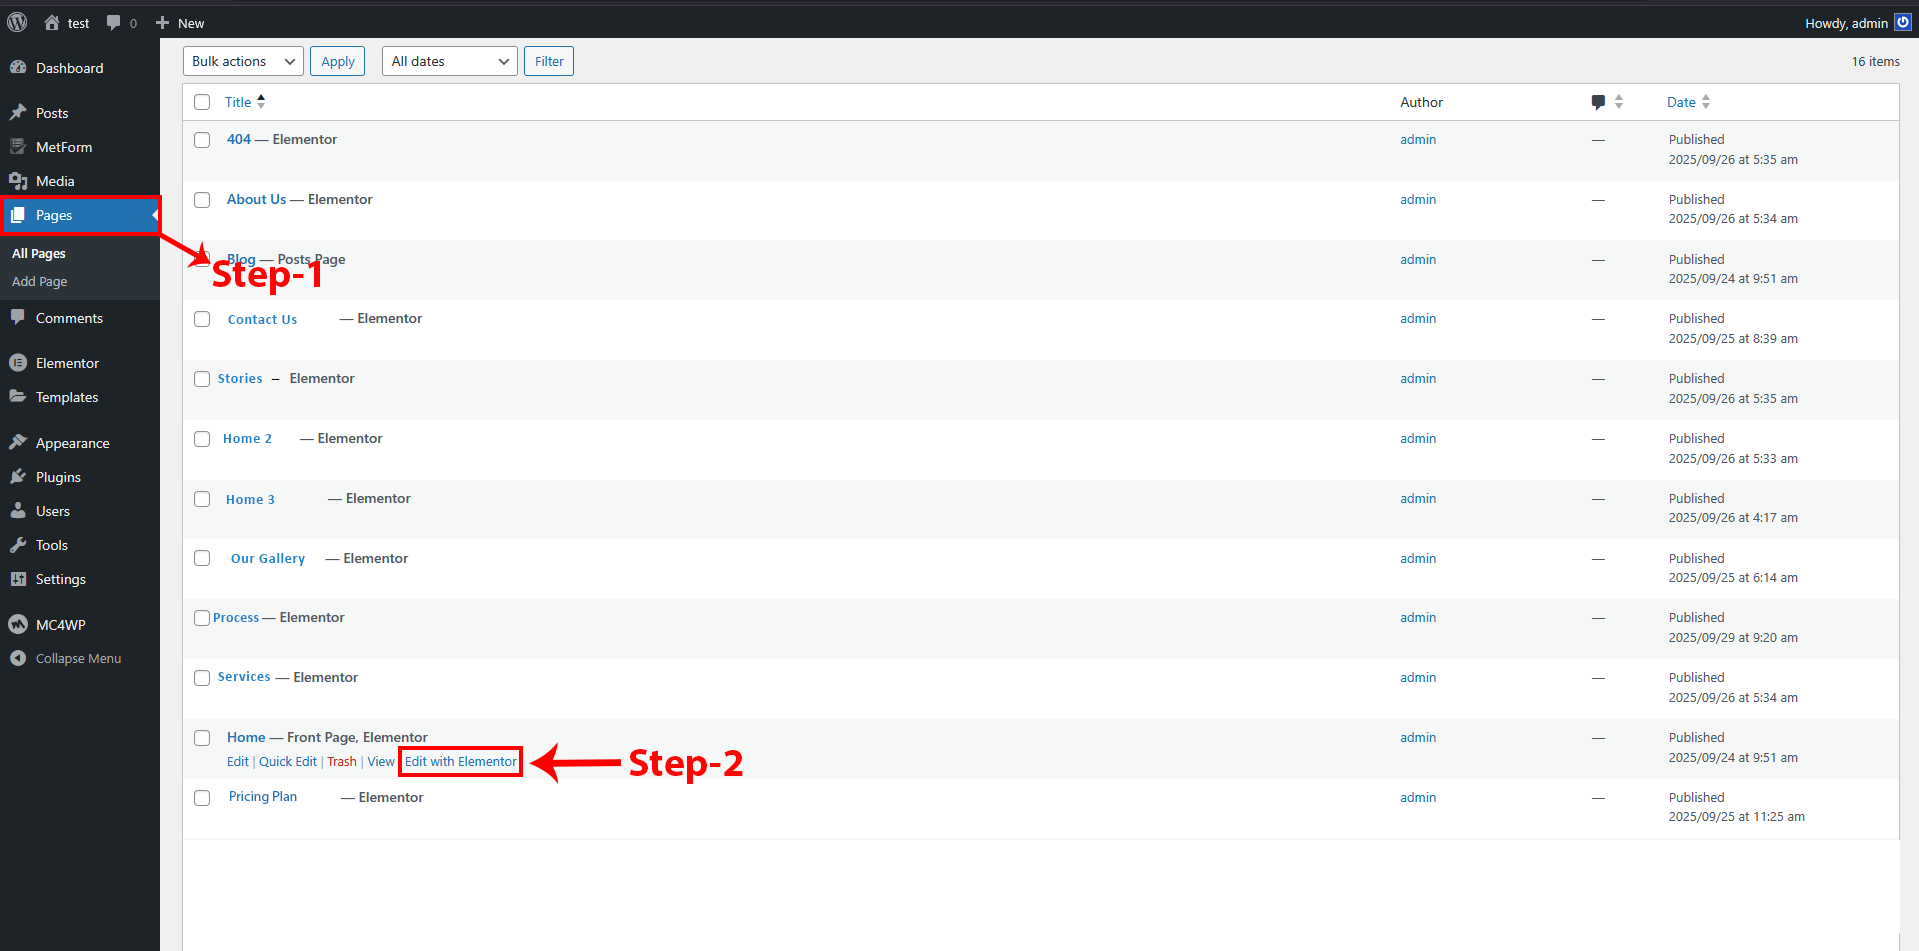
Go to the pages and hover on home->edit with elementor.
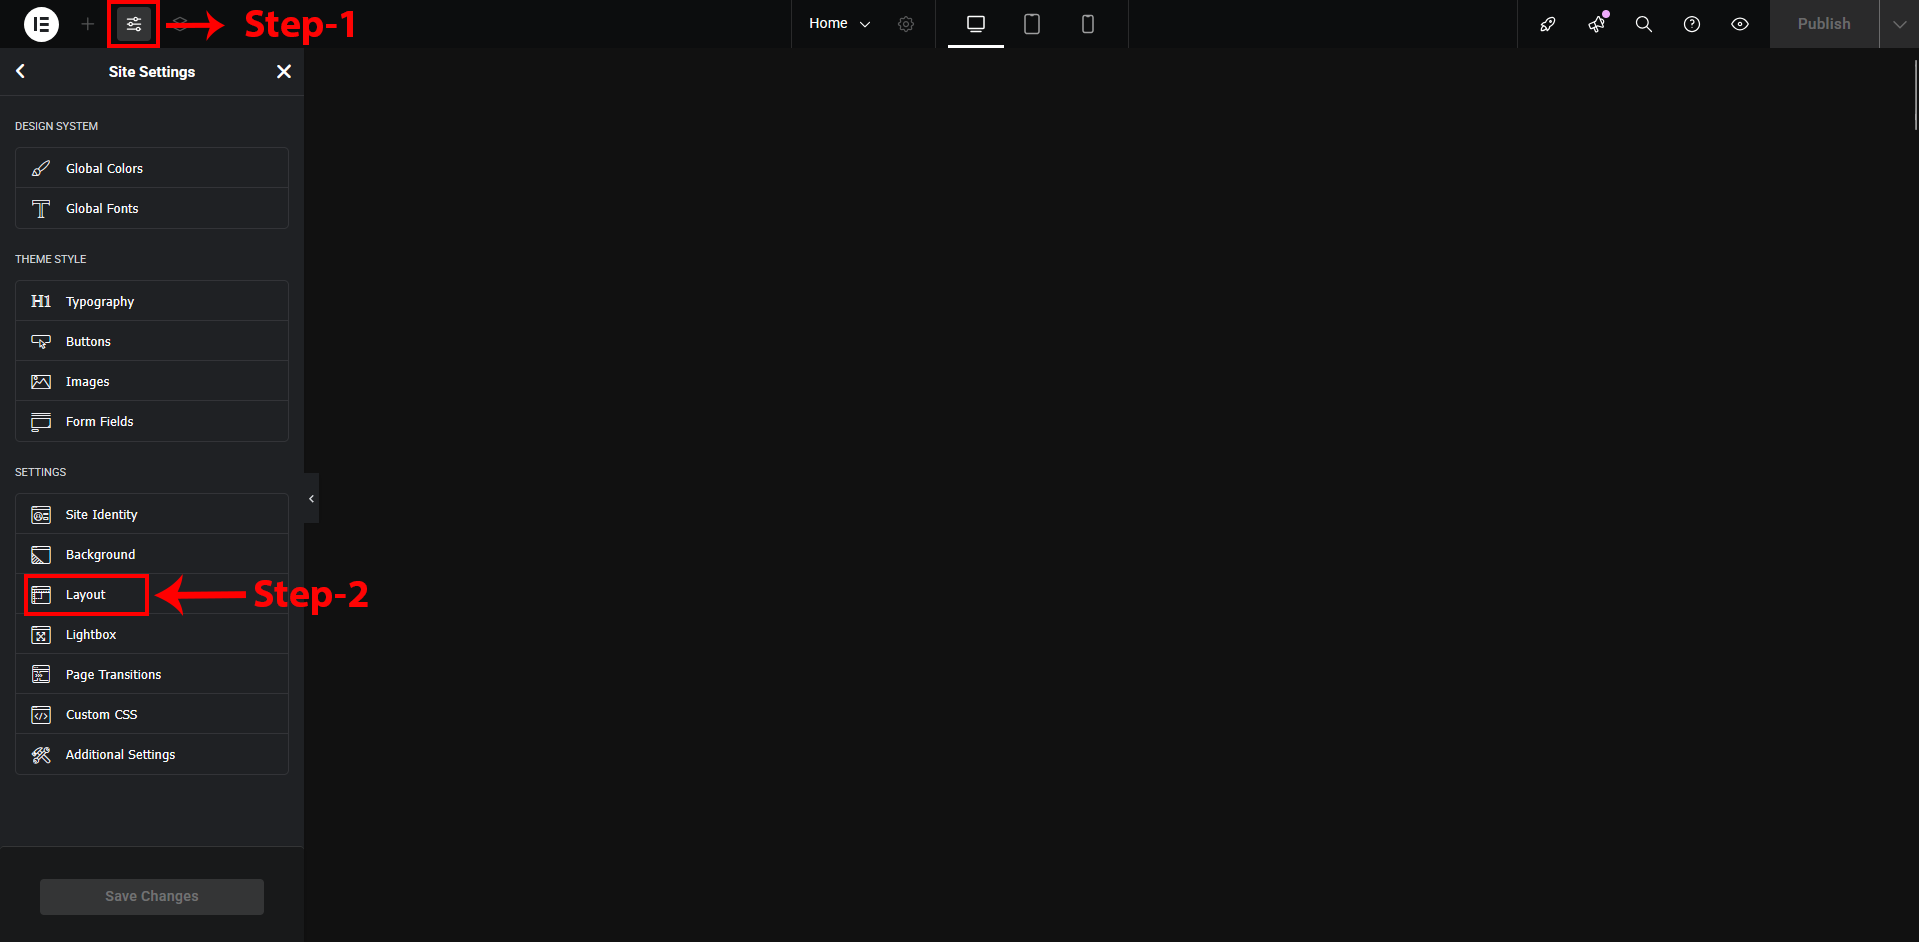
Go to the site setting & Select the layout option
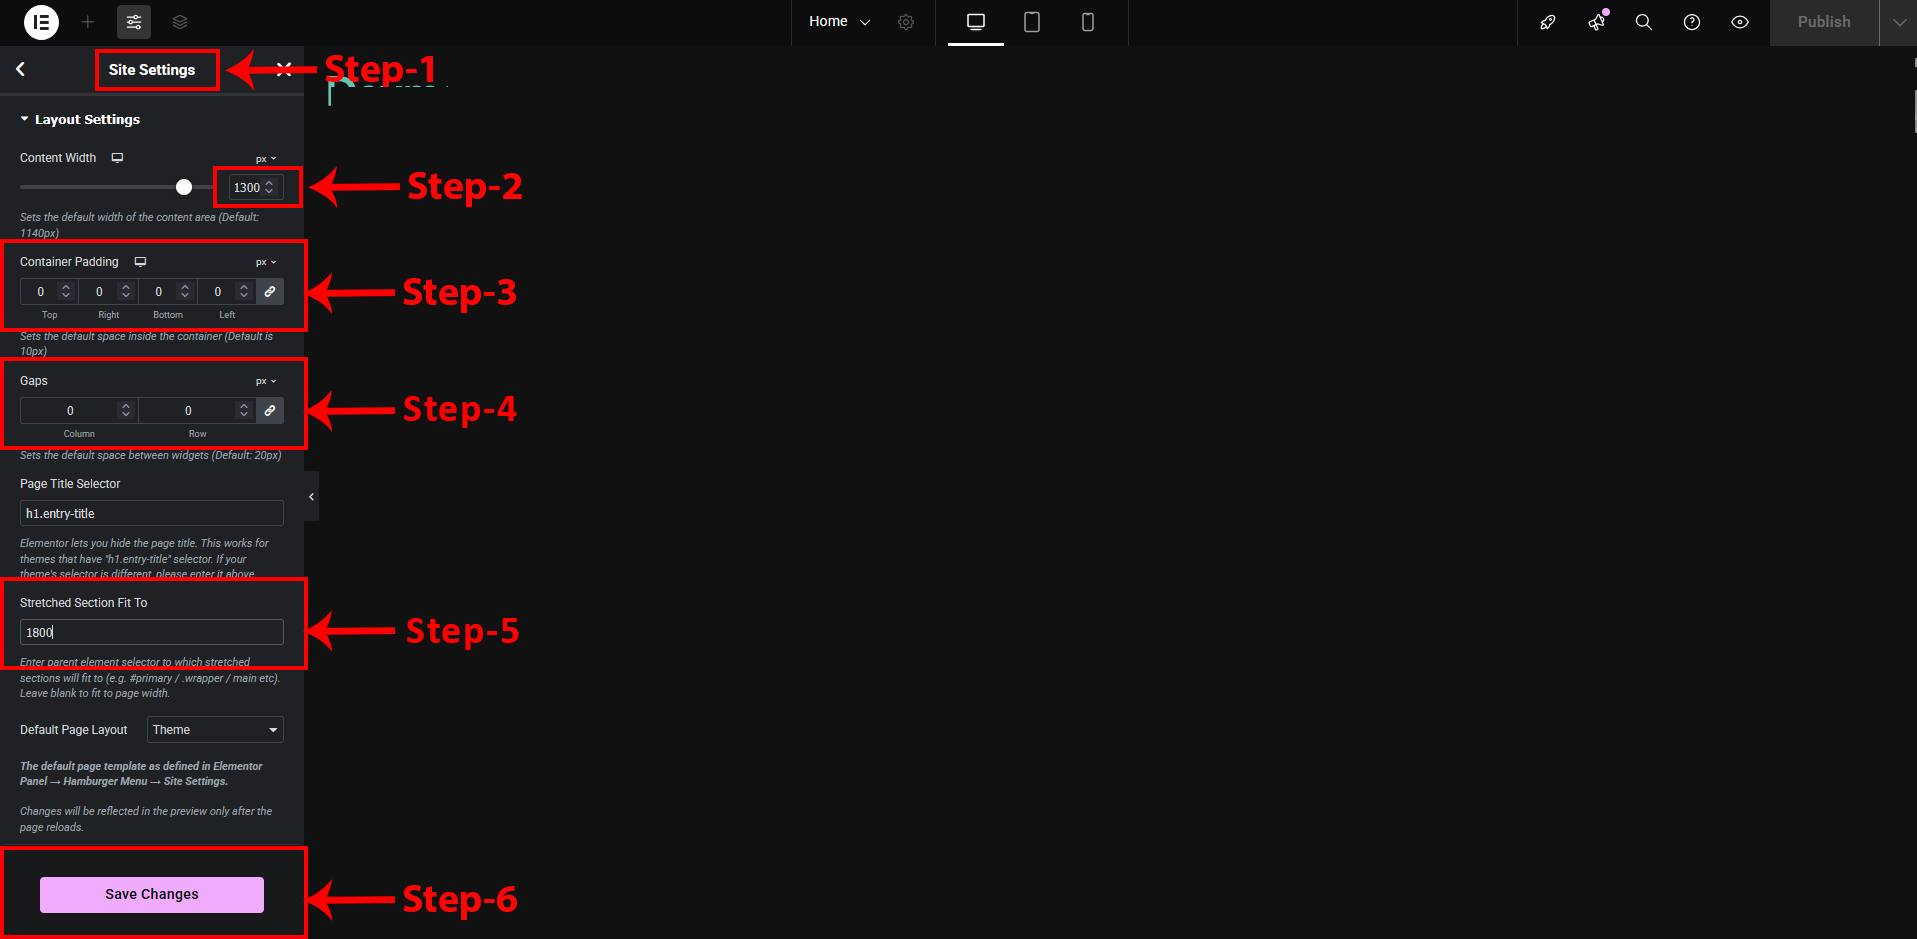
Make changes according to given picture and save changes
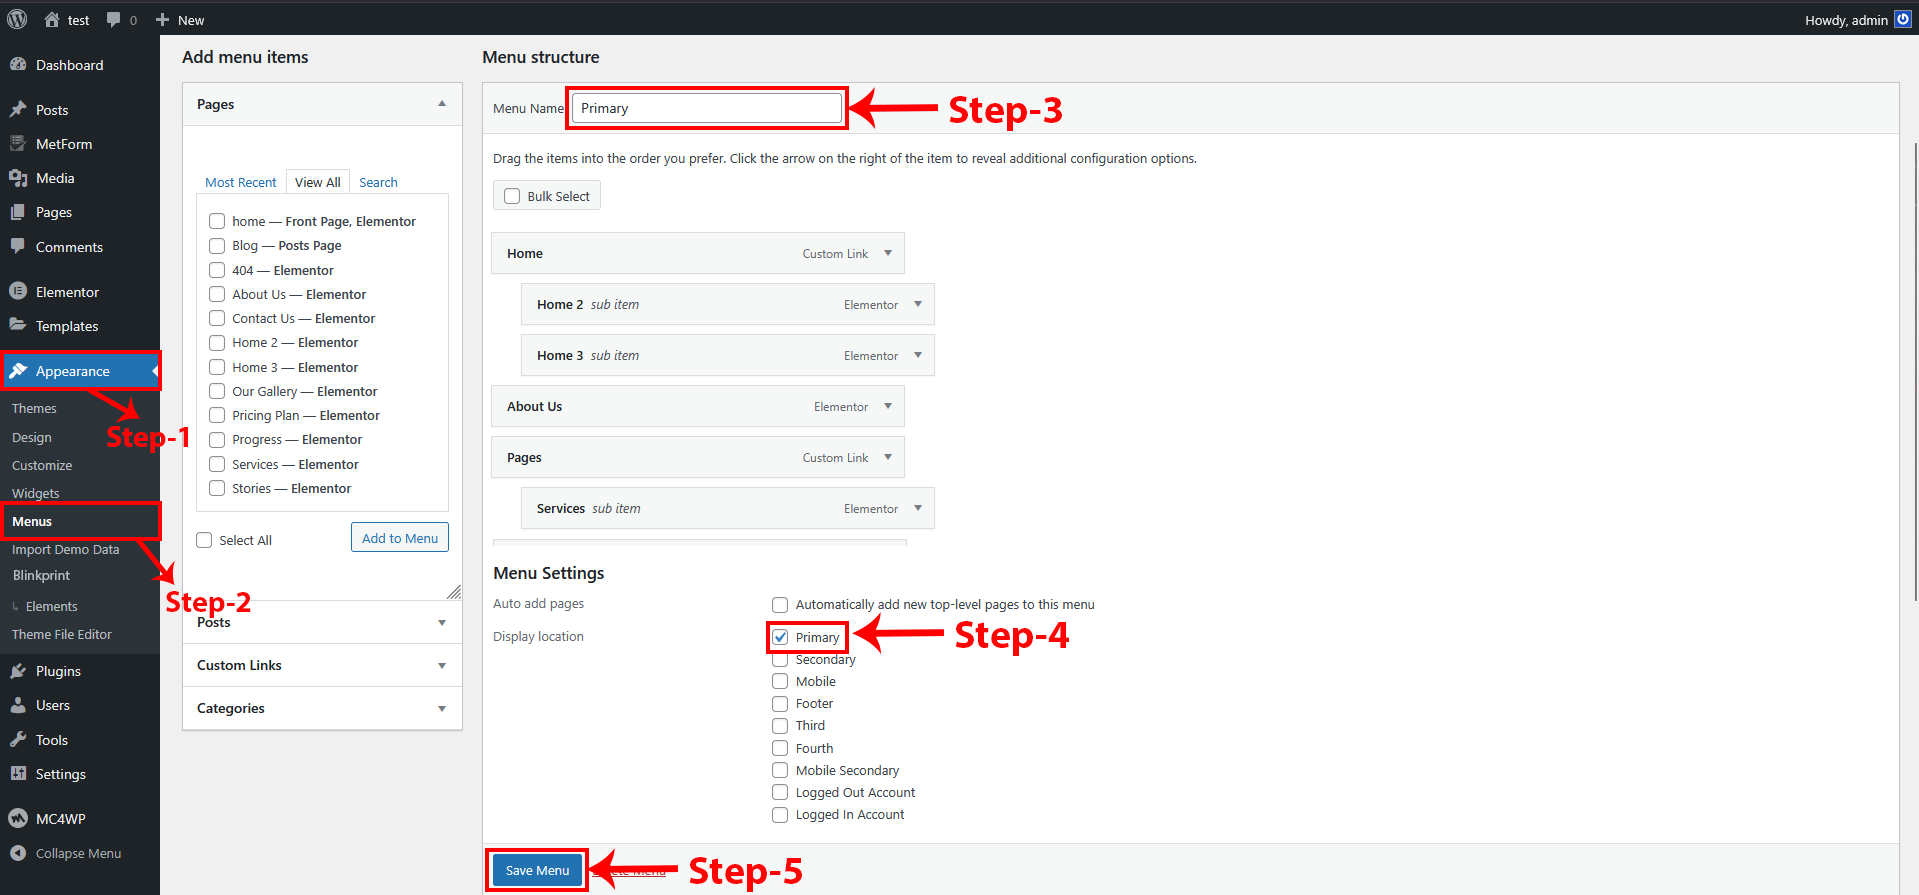
Menu Option
In this menu option, you need to write your menu name in the “Menu Name” field. After that, you can arrange the menu items as per your requirement. Finally, select your menu name in the option below and save the menu.
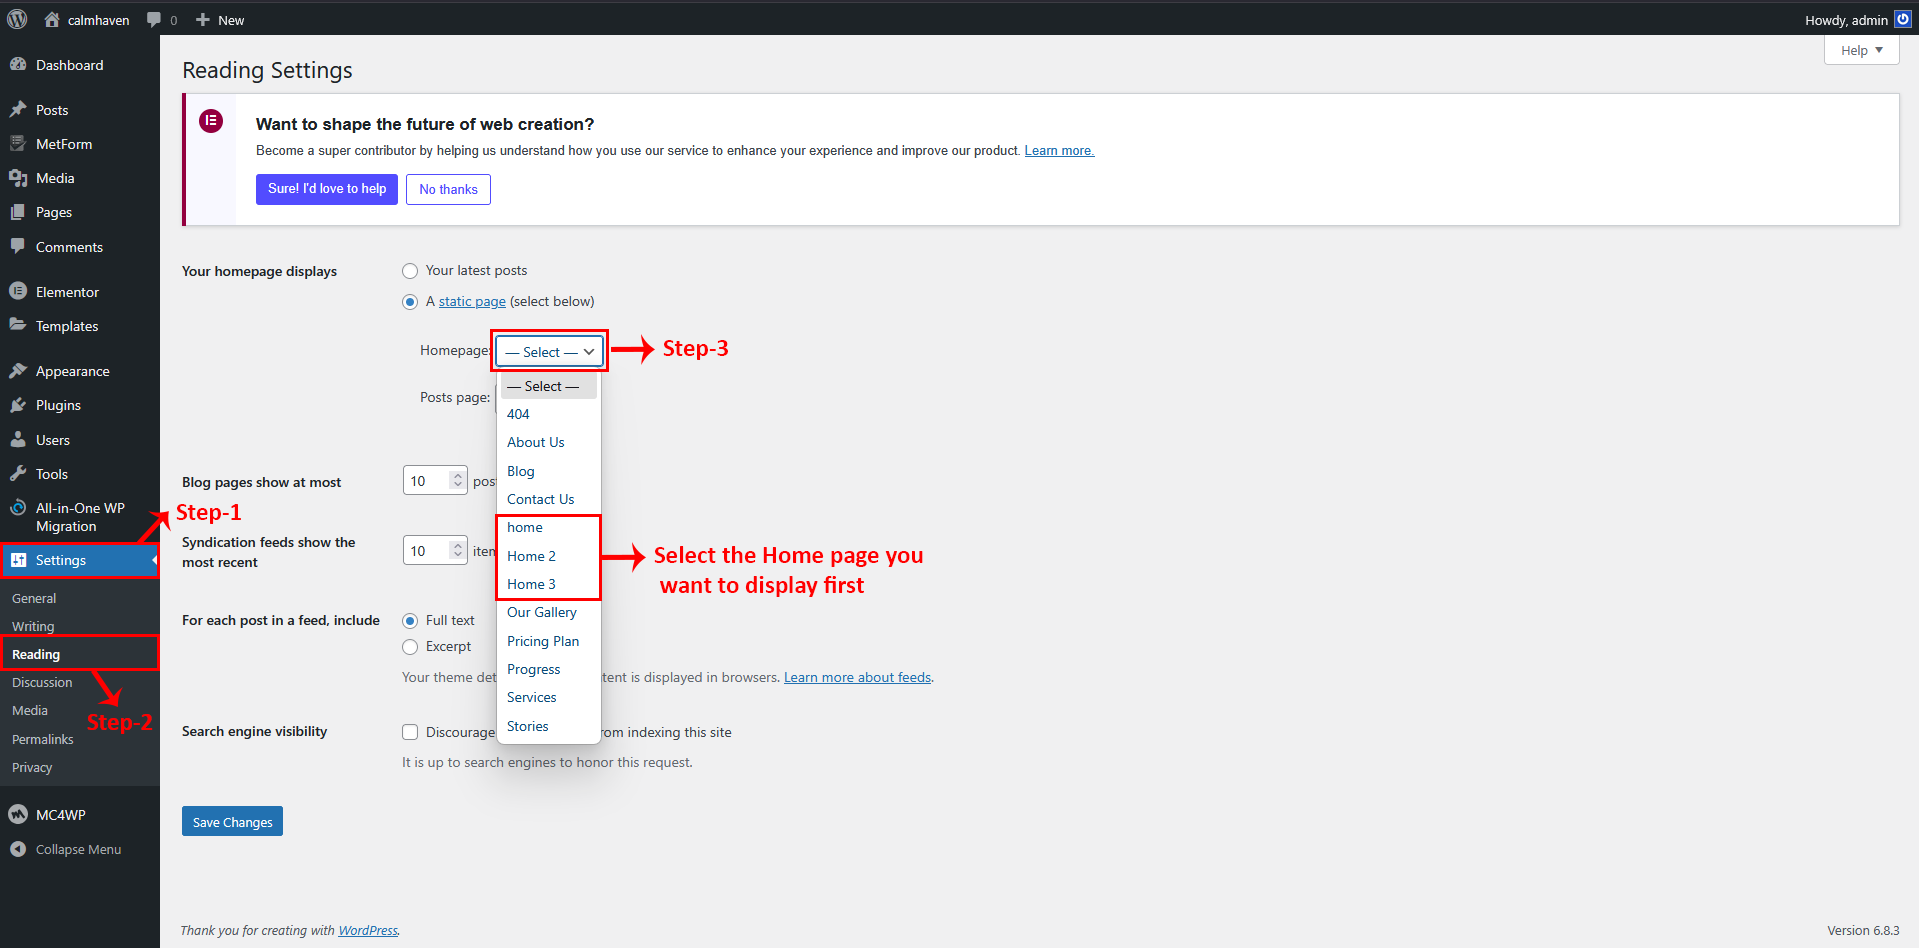
Reading Setting
In these options, first choose “Static Page.” After that, select the Home page you want to display as the first (default) page on your site. This ensures that whenever you open your website, the selected Home page will be shown by default.
Mailchimp Option
In Mailchimp, the user should first enter their API key and save the changes. The form is always available, but if the user wants to customize the form’s code or appearance, they can make the desired changes and save them to update the form.
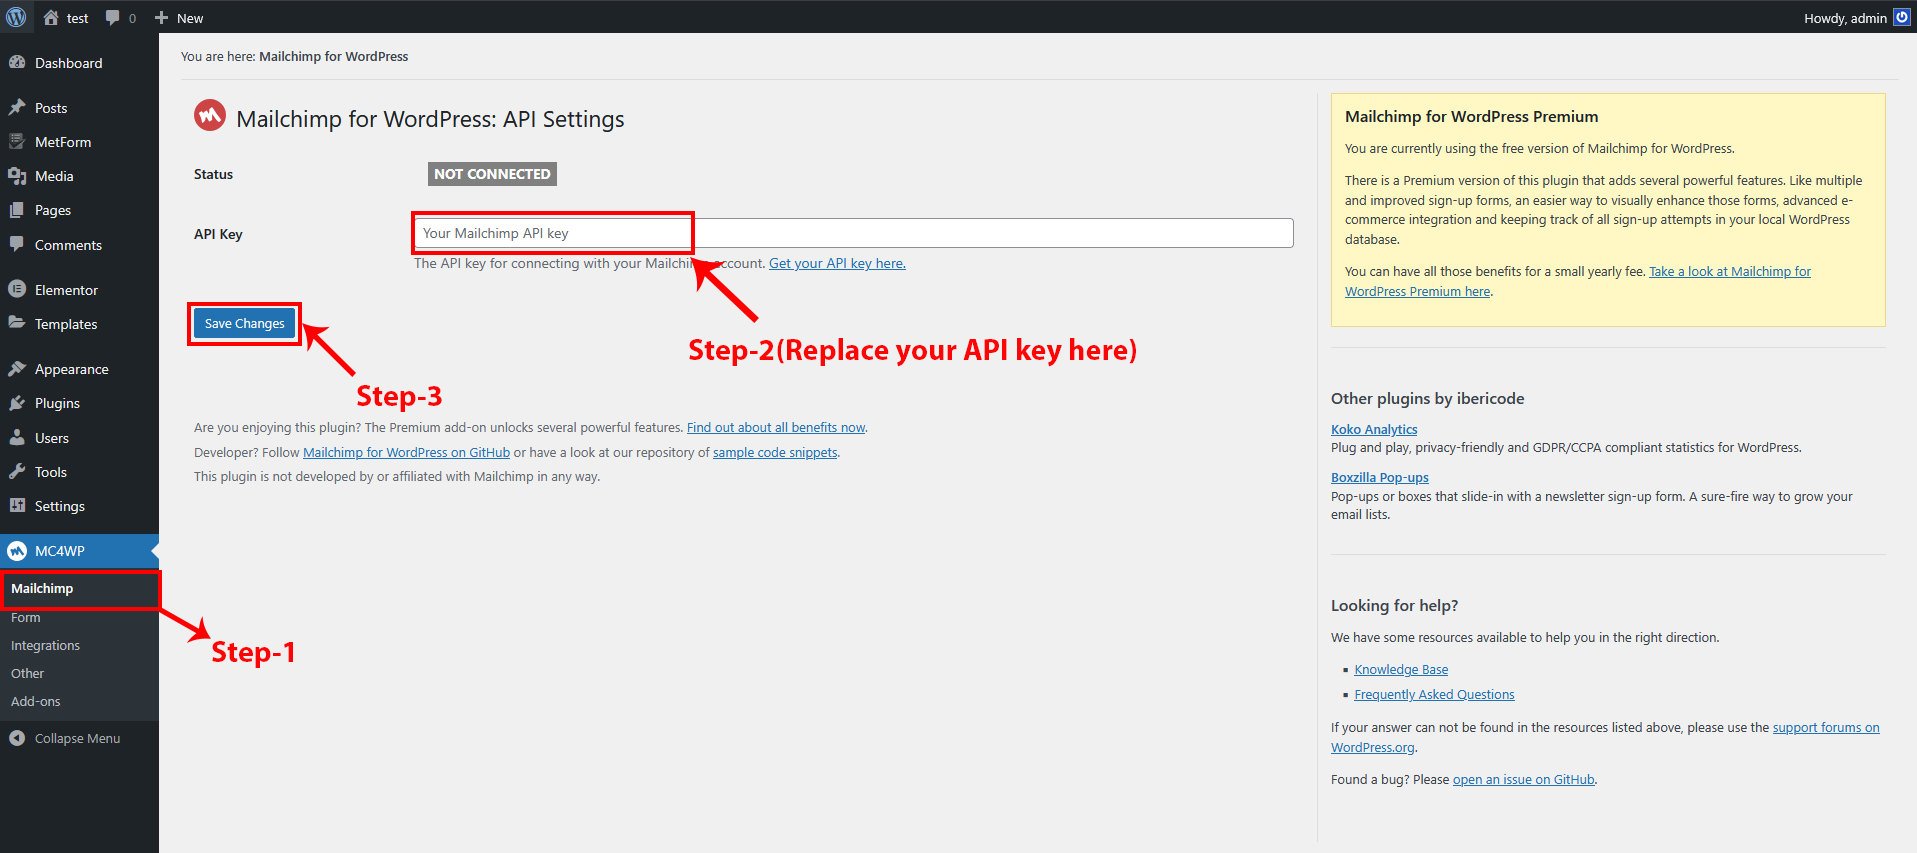
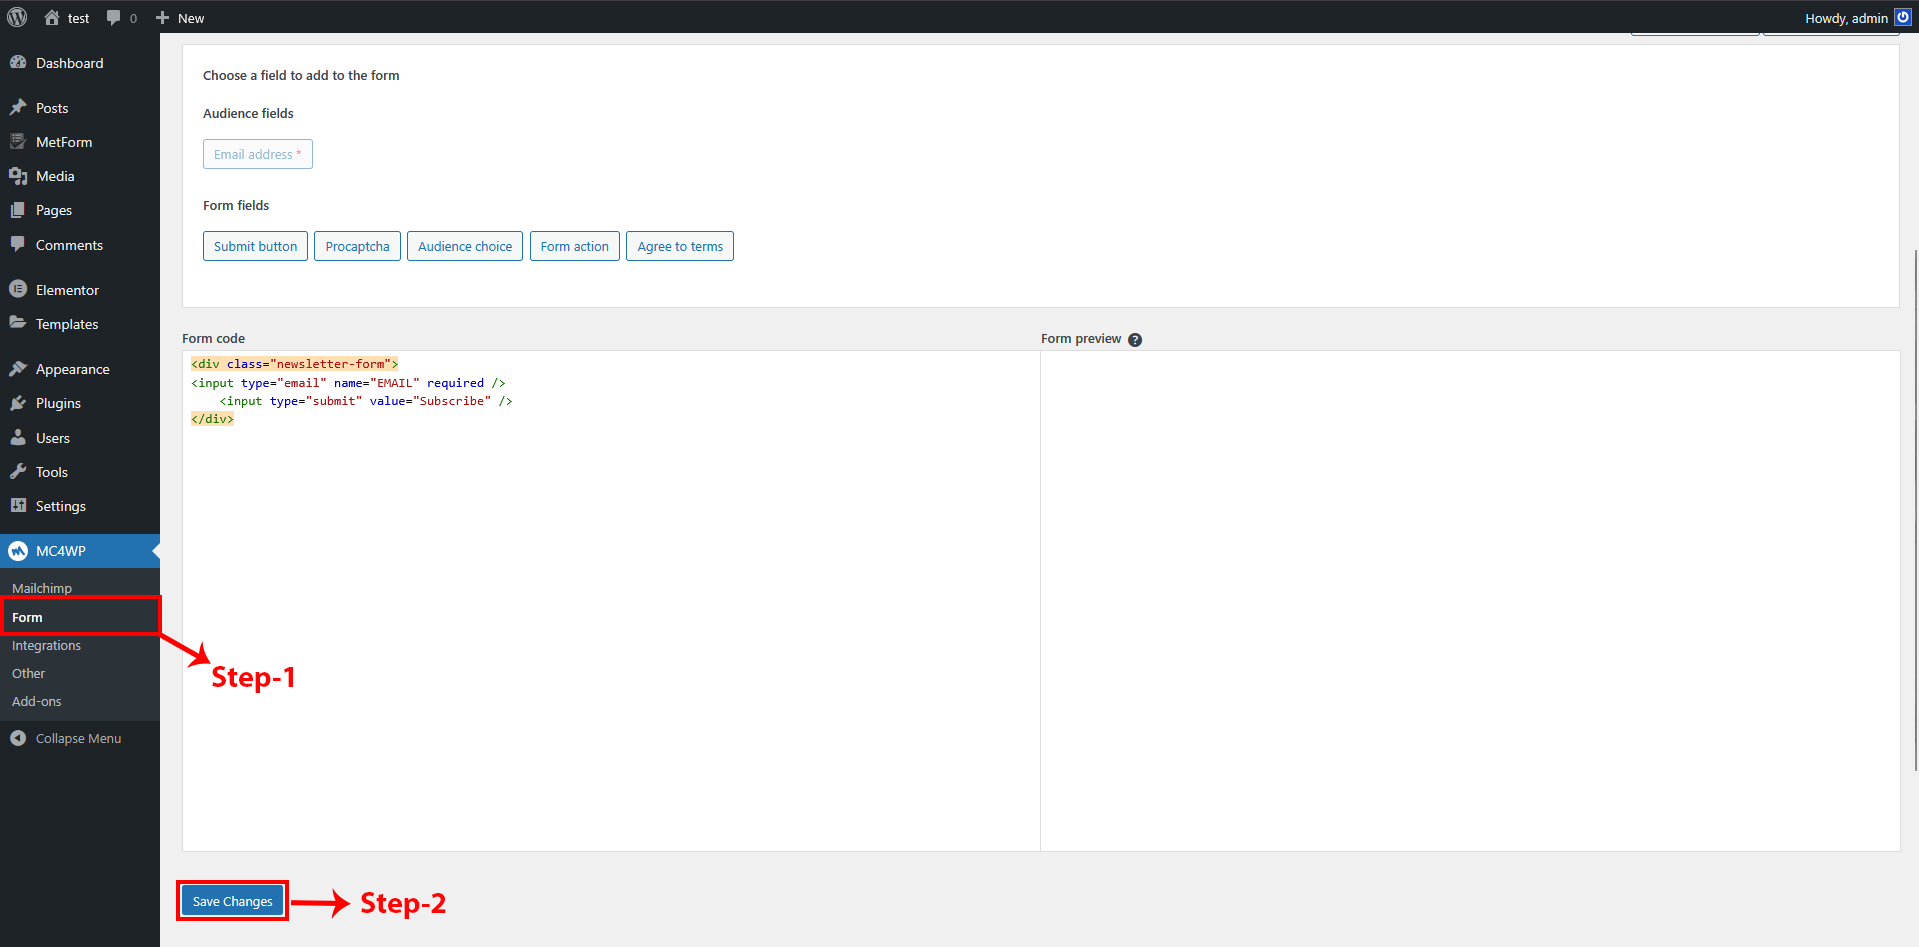
If users want to make changes in Mailchimp, they need to go to the form.
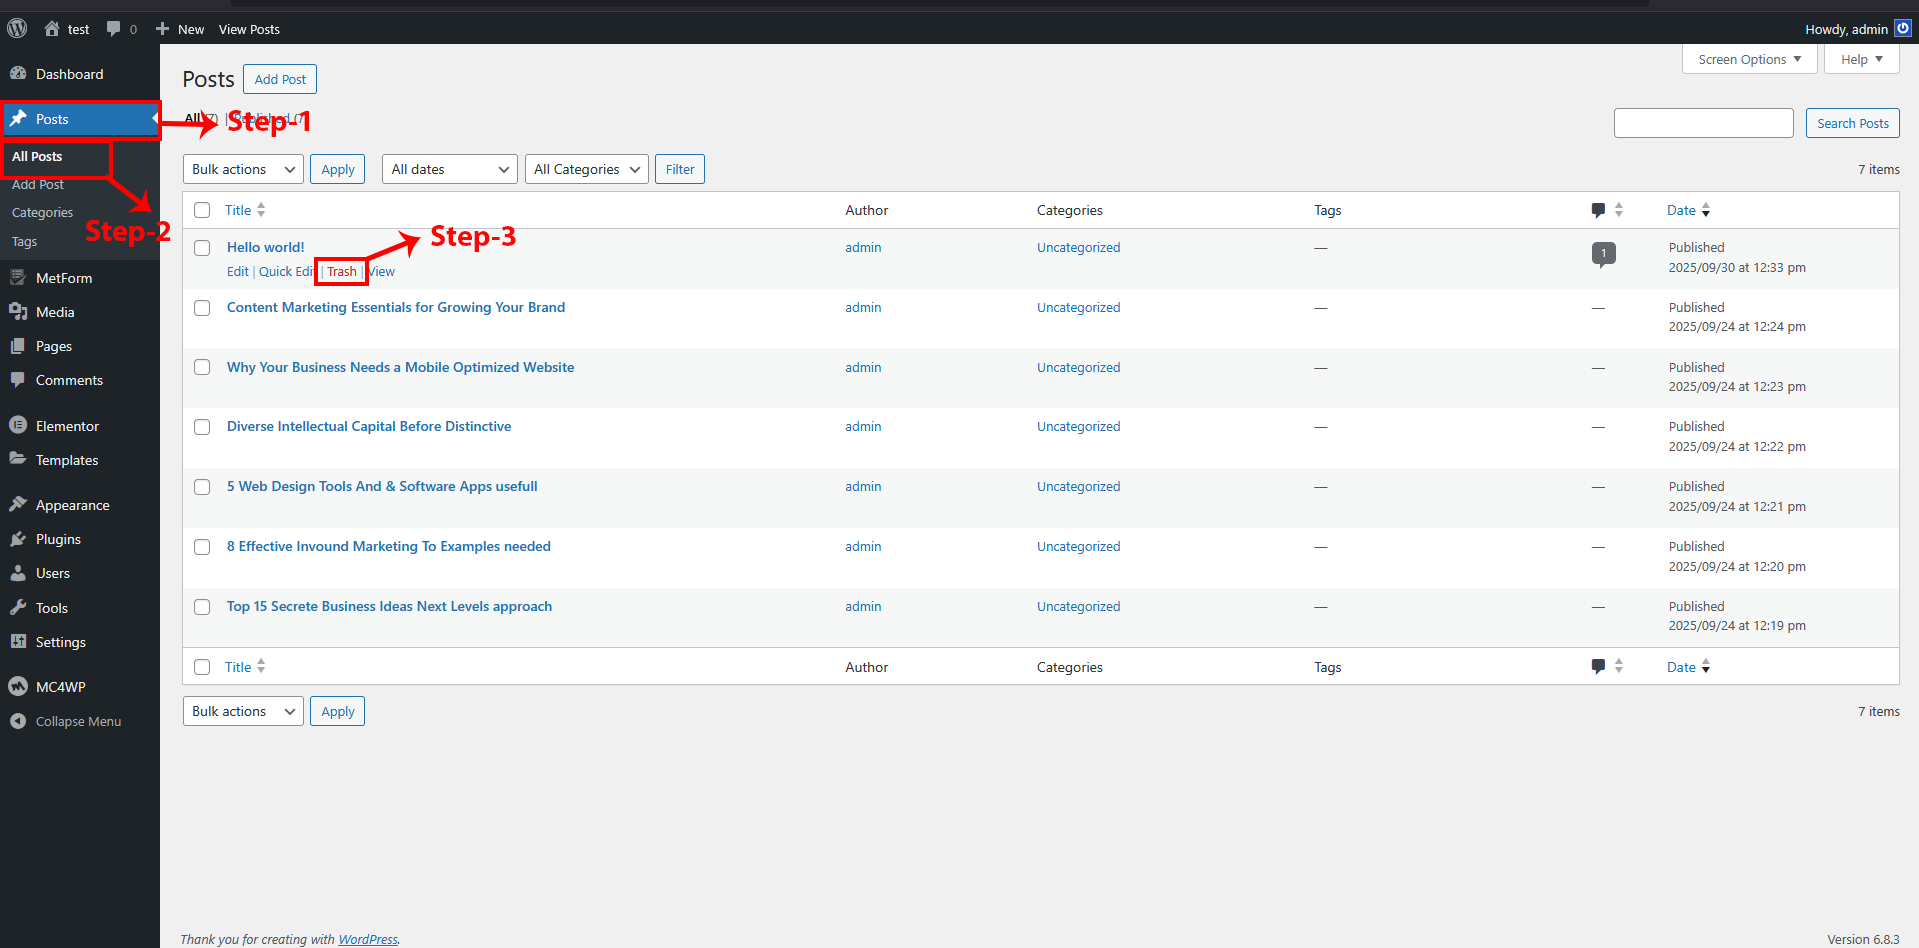
Post Setting
In the post settings, you need to delete the specific file that is not useful and make the unnecessary changes in the structure.
Theme Options
Header
To change Theme Options header navigate to Dashboard-> Appearance-> Header Make the changes wherever you need.
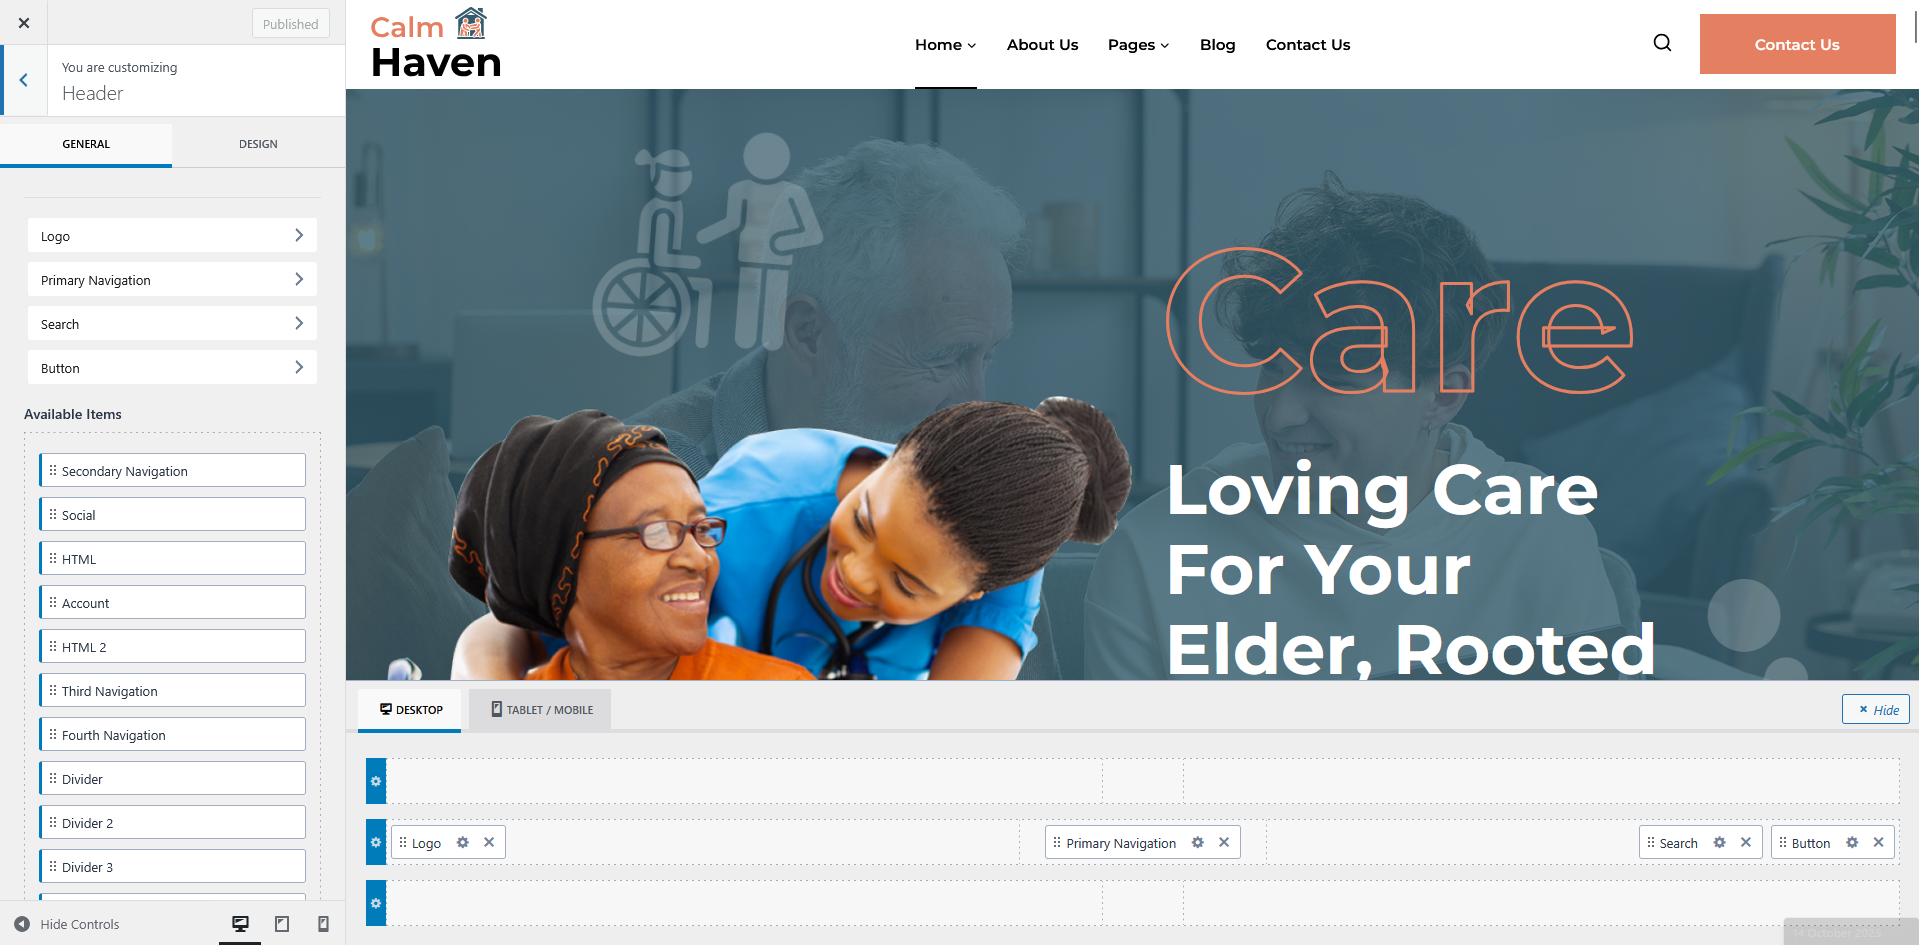
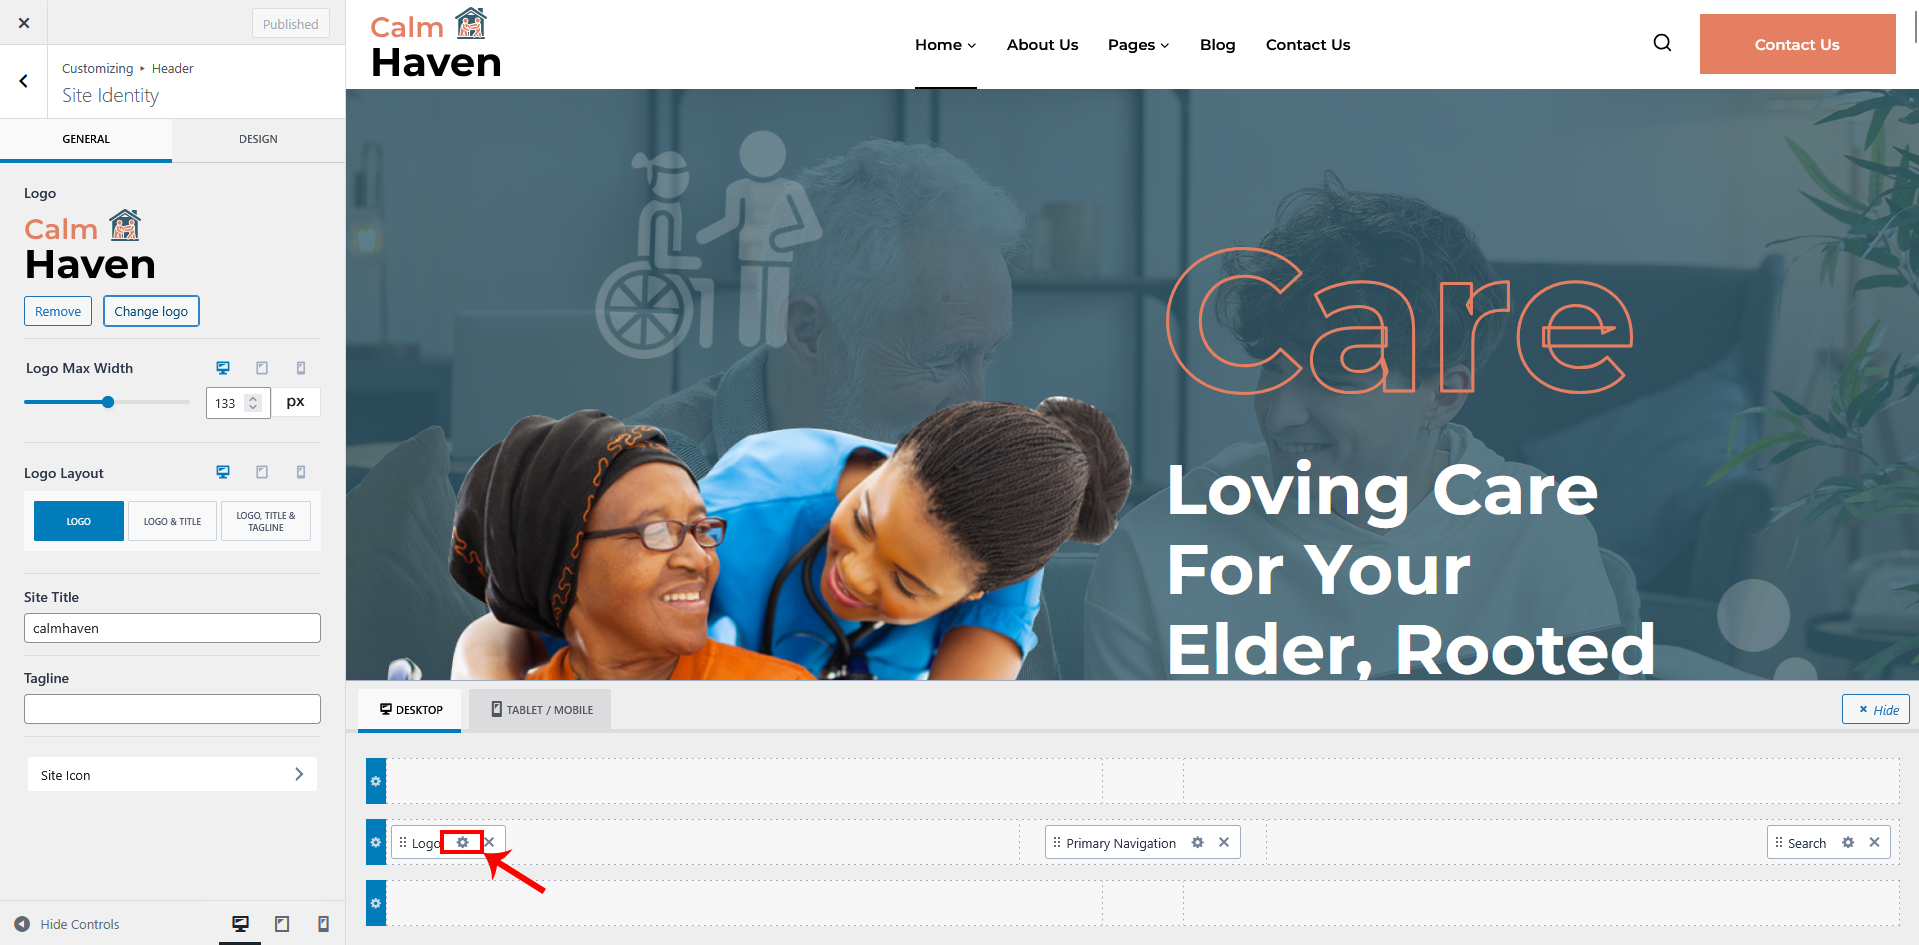
To make any changes in any Header items click on the setting icon like shown in picture.
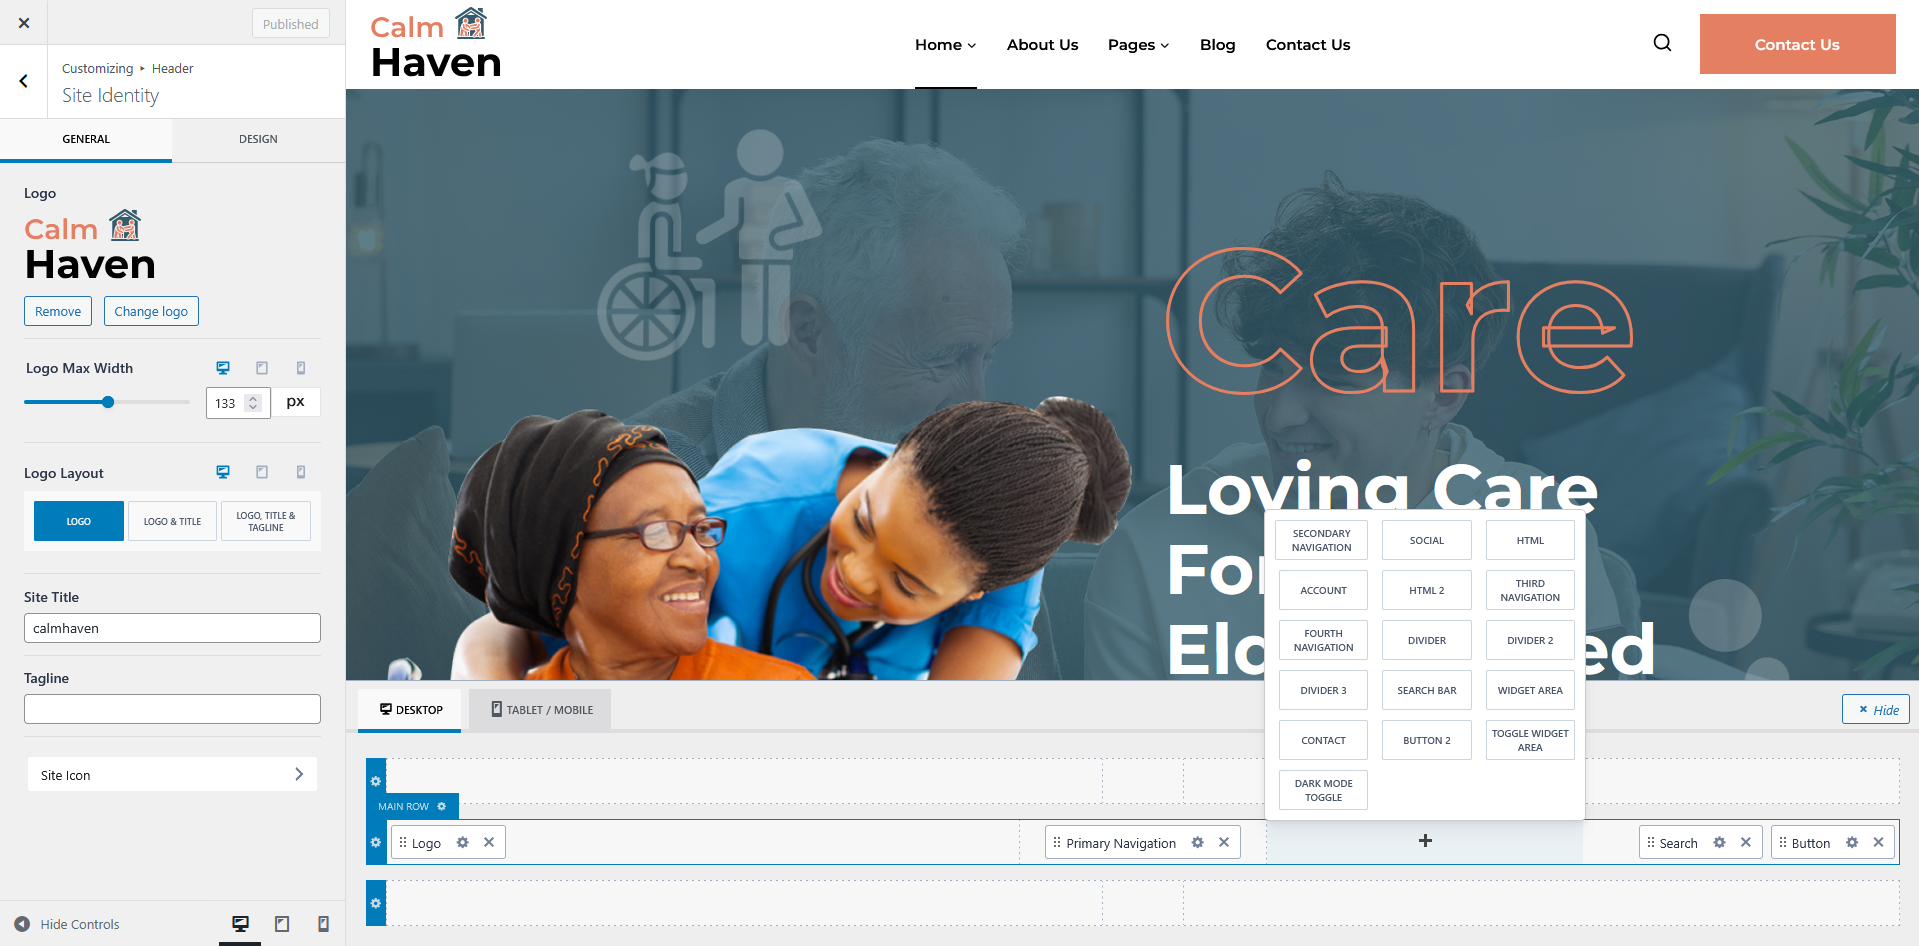
If you want to add a widget item, hover over the row to display the “+” icon. Click on it to see more options and select the one you want to add. After making any changes, make sure to publish them to save youe changes.
Footer
To make changes in Theme Options footer then go to Dashboard-> Appearance-> Footer Make the changes wherever you need.
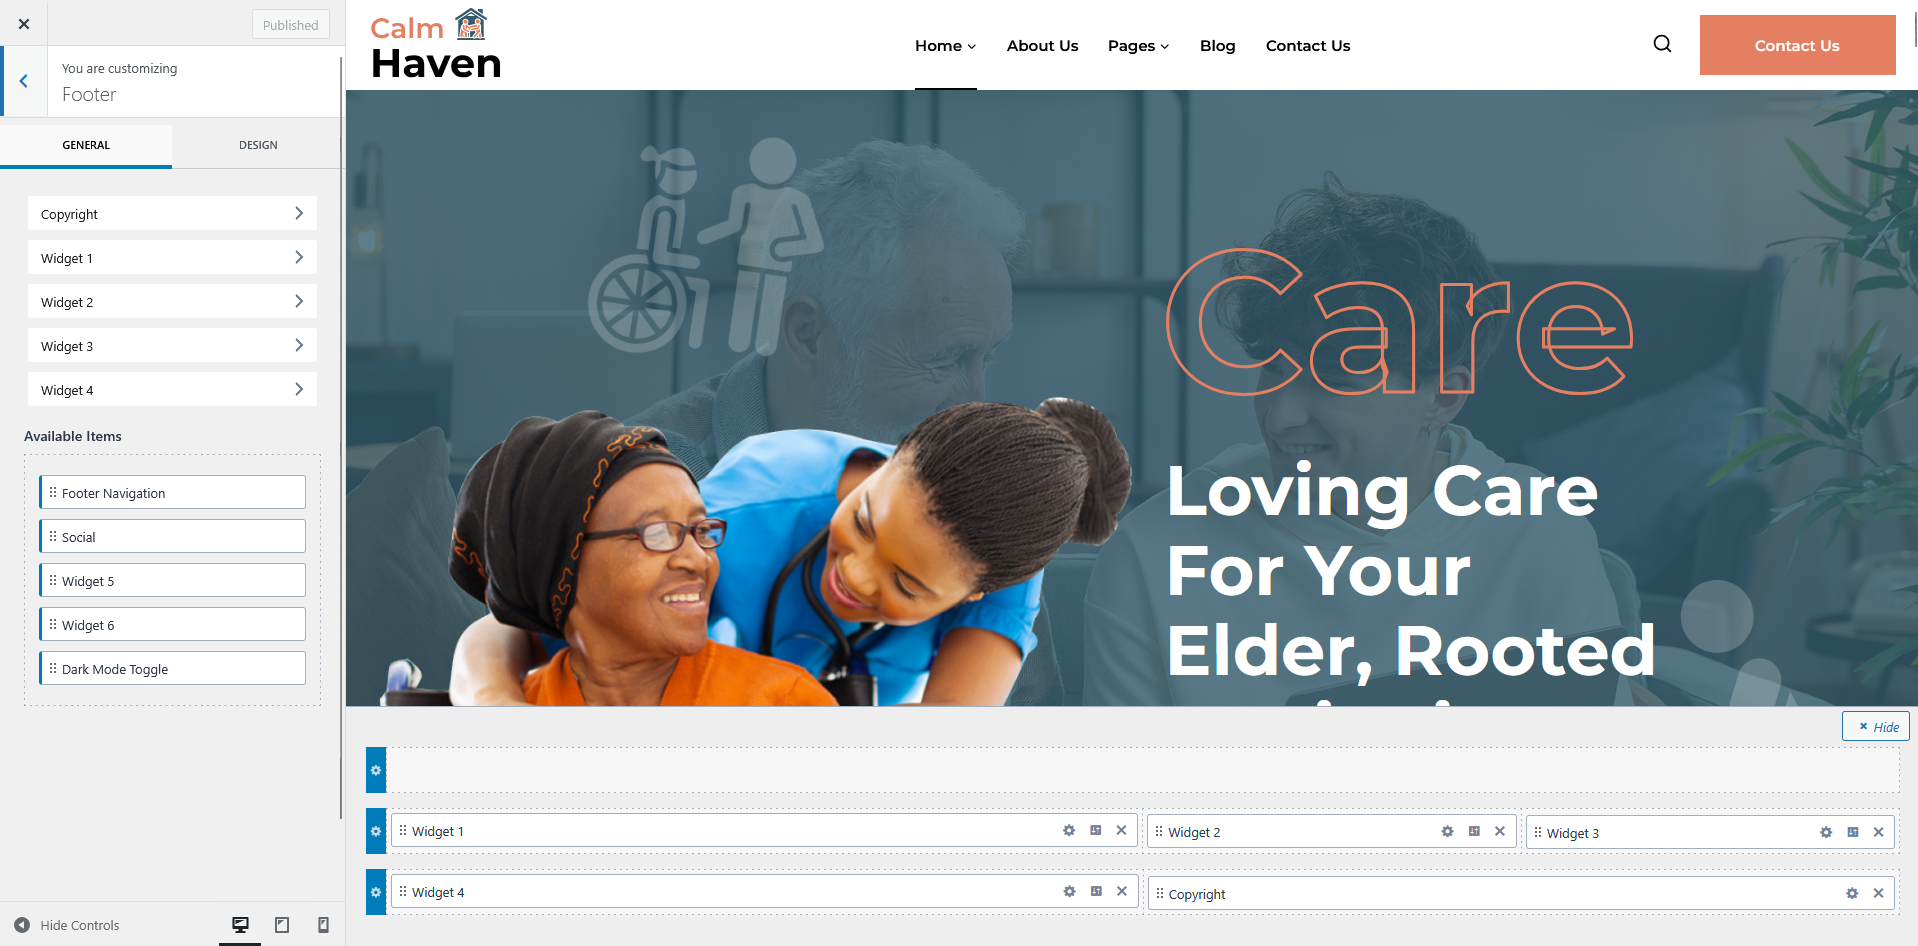
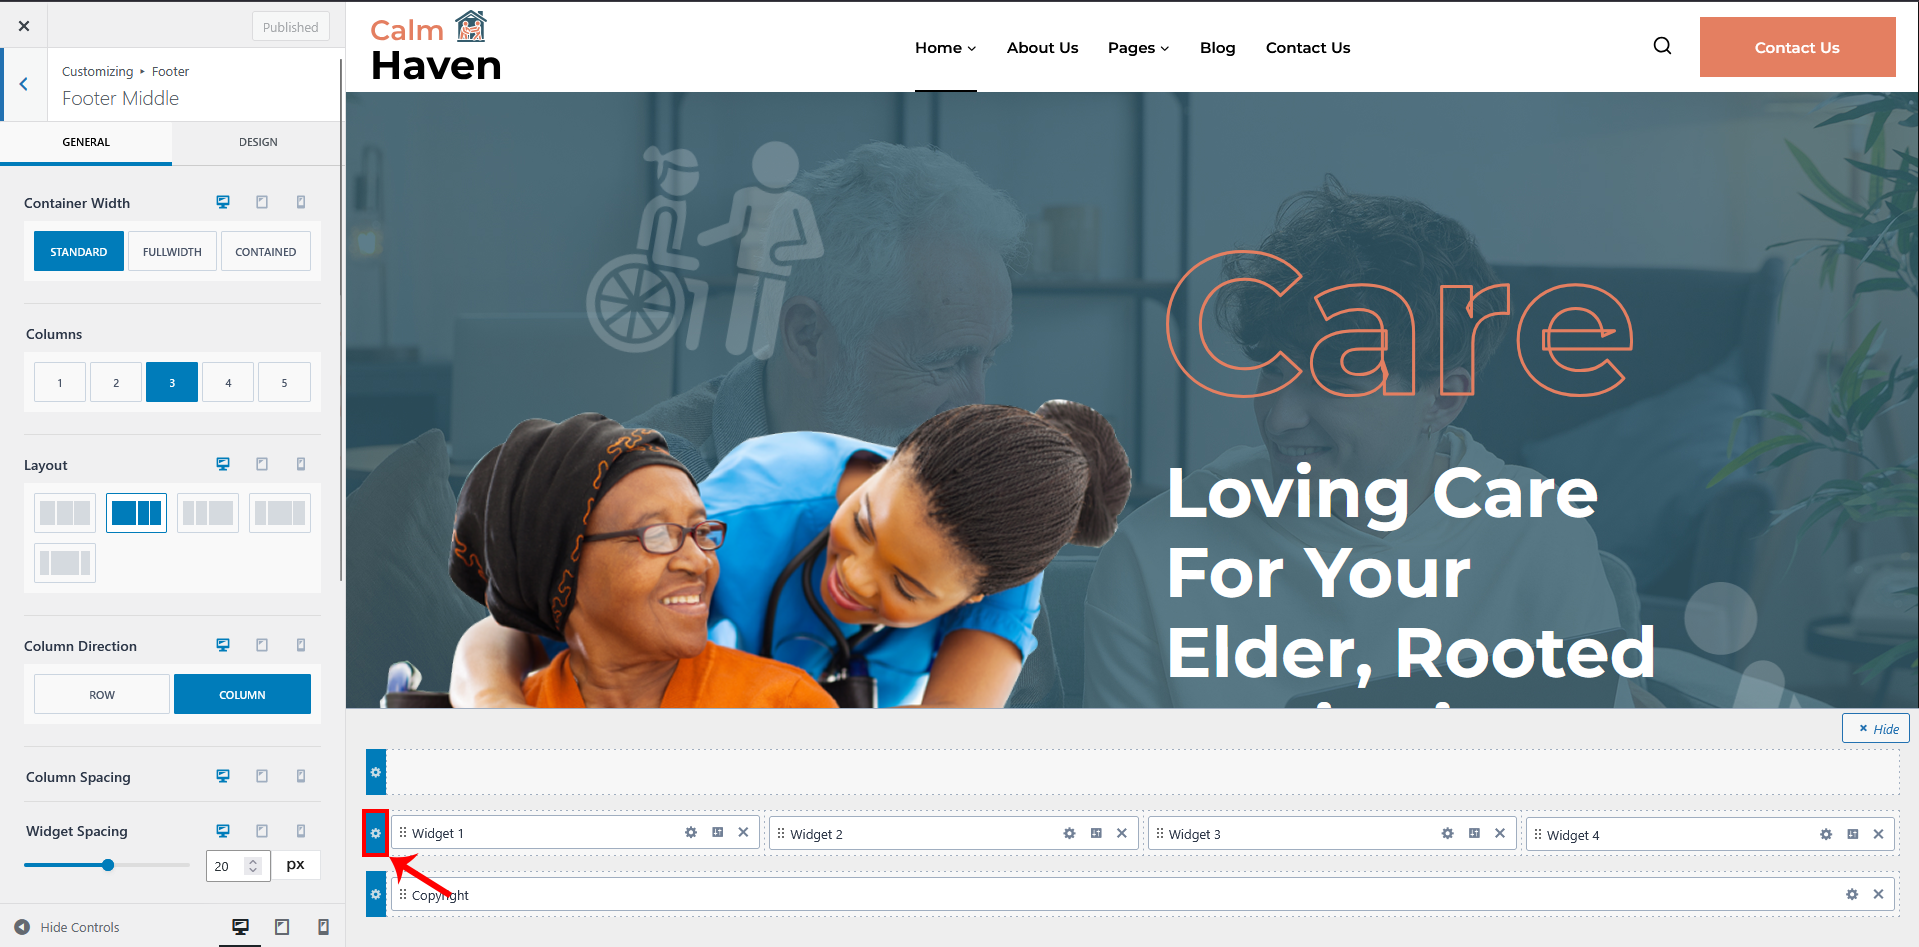
If you want to see more footer styling options, click on the settings icon as shown in the picture and if you make any changes that click on the publush button to save your changes.
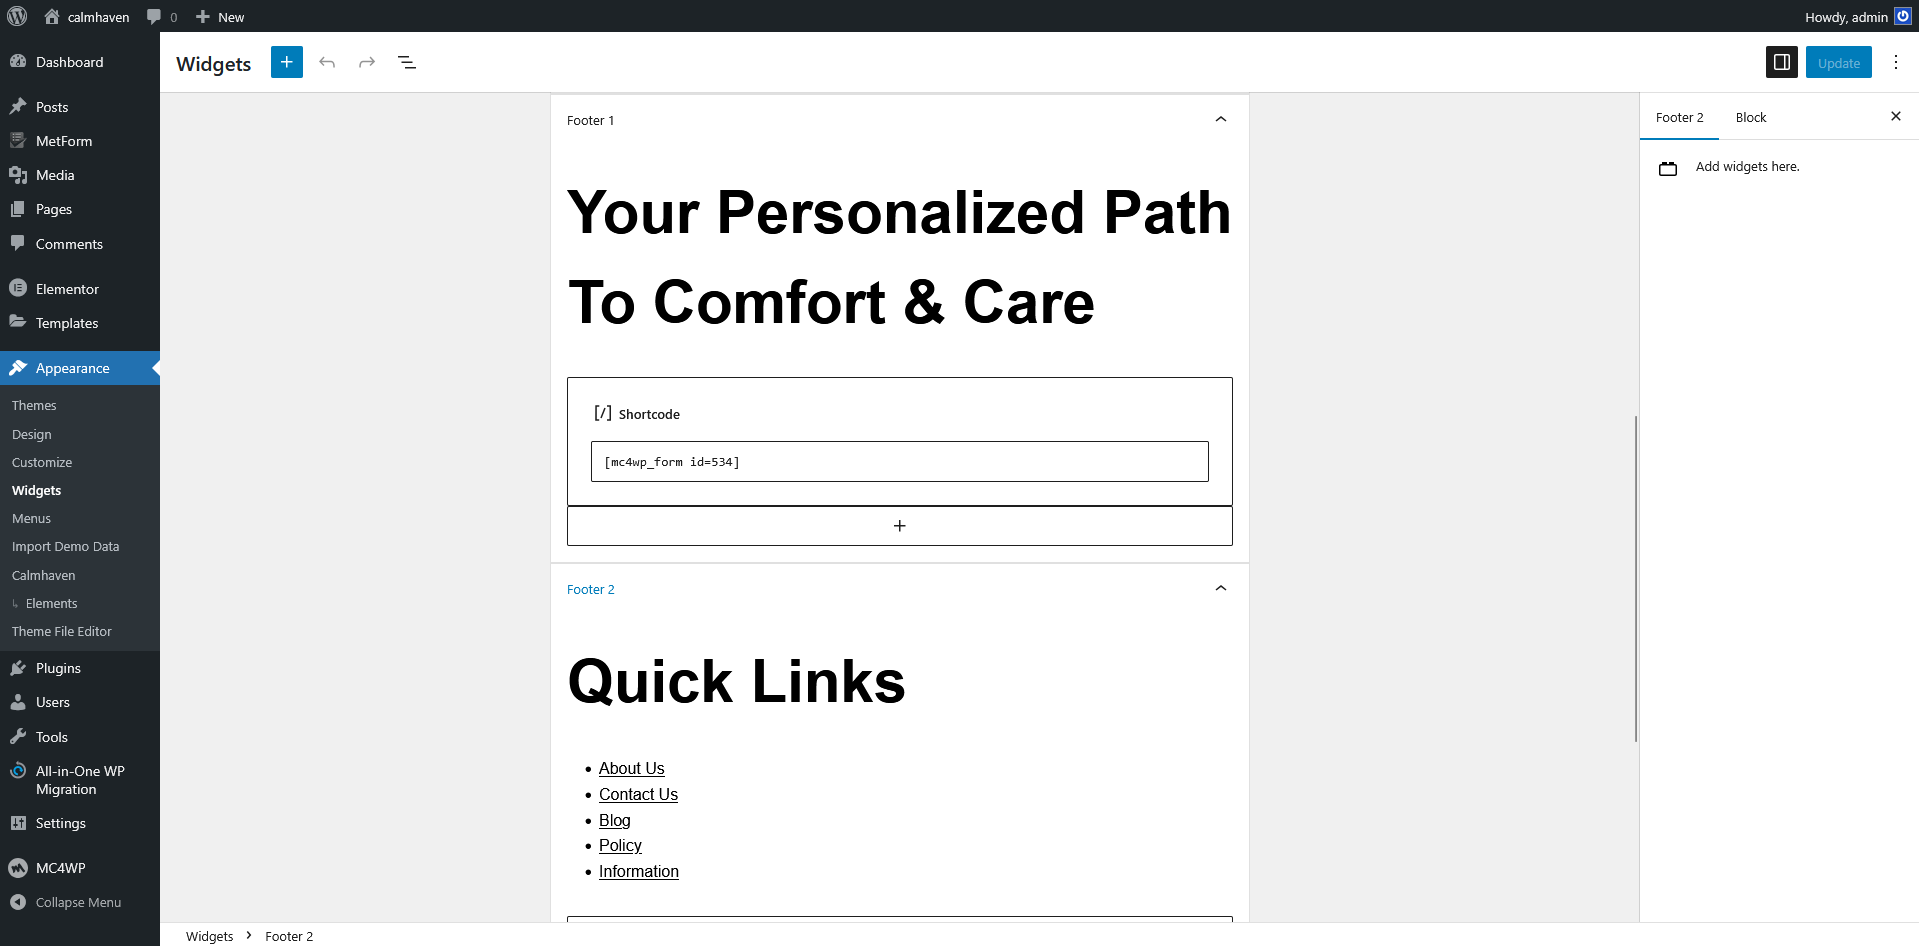
If the user wants to change the footer text, they can do by going to Appearance → Widgets and after making changes click on the update button to save changes.
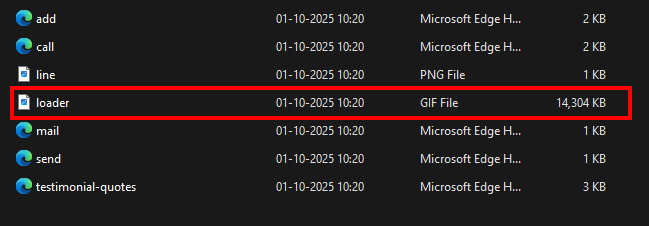
Loader
To make changes in loader then go to Wp-content-> themes-> your child theme -> assets -> image here you can replace loader.